Hello! Welcome to Kylie Bertucci’s Demonstrator Training Blog Hop for July. I’m part of a group of Stampin’ Up! demonstrators from around the world that participate in Kylie’s program for building our businesses. Please be sure to click on the names in the list at the end of this post to hop around and view the beautiful cards posted by so many talented stampers.
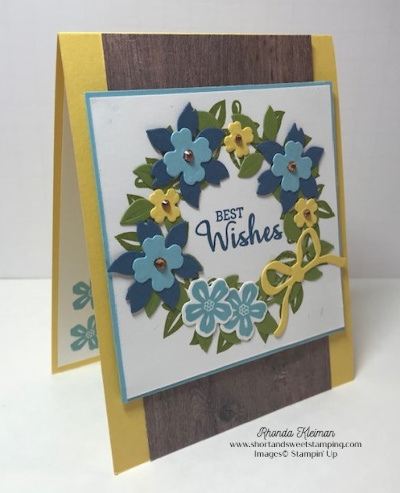
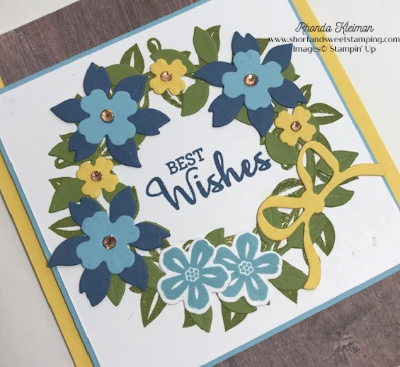
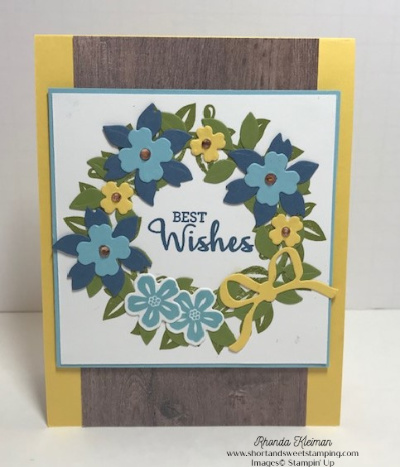
Today I’m sharing a card I made with the new Arrange a Wreath bundle. I love that this set is very versatile and can be used for so many different occasions. Without any holidays coming up right now I decided to make something with a summer feel to it and picked blue and yellow for my color palette.

Here is how I made the card.
- Card base – cut a piece of Daffodil Delight cardstock at 4 1/4″ x 11″, score at 5 1/2″ and fold in half.
- Cut a piece of one of the woodgrain papers from the In Good Taste Designer Series Papers at 3 1/4″ x 5 1/2″ and adhere to card front.
- Cut piece of Whisper White cardstock at 3 3/4″ square. Cut piece of Balmy Blue cardstock at 3 7/8″ for the layering piece.
- Stamp wreath image from the Arrange a Wreath stamp set in Old Olive ink. Stamp greeting with Misty Moonlight ink in center of wreath. Because the wreath image is large I used the Stamparatus to get good ink coverage, and it also helped to line up the greeting.
- Stamp two flowers with Balmy Blue ink and run through die cutting machine with coordinating dies.

- Die cut the rest of the pieces for the wreath as follows:
- Leaf circle – Old Olive cardstock
- Large flowers – cut three from Misty Moonlight cardstock
- Medium flowers – cut three from Balmy Blue cardstock
- Small flowers – cut three from Daffodil Delight cardstock
- Bow – cut one from Daffodil Delight cardstock
- Adhere leaf circle on top of stamped wreath image and then arrange the flowers and bow around the wreath. I layered the blue flowers together.
- Adhere image to Balmy Blue layer and adhere to card front with Stampin’ Dimensionals.
- For some extra bling I added Champagne Rhinestones to the centers of the flowers, using the smallest size or the yellow flowers and the medium size for the blue flowers.
- For the inside of the card, cut a piece of Whisper White cardstock at 4″ x 5 1/4″. Stamp a cluster of flowers with Balmy Blue ink at bottom left corner of piece and adhere.


Bonus Days are back once again! From July 1 through August 3rd, for every $50 you spend (before shipping & tax) you will receive a $5 Bonus Day coupon code that can be used from August 4th – 31st.
- You must have an email address in order to participate because the codes can only be delivered electronically.
- If you earn multiple coupons in a single order, all of the codes will be sent in one email. If you earn multiple coupons for multiple orders they will be sent in separate emails for each code earned.
- There is no limit on the number of coupon codes you can earn during this promotion.
Thanks for stopping by today!

Product List


beautiful card! love the color combo you picked!
Thanks, Alejandra! I love how the colors work together.
Beautiful Wreath! Thanks Rhonda for taking part in our Demonstrator Training Blog Hop this month!
Thanks, Kylie! I’ve been enjoying participating in your blog hops!
Your colours work well together. A beautiful card.
Thanks, Jill! I love how the colors work together.
Lovely card Rhonda
Thanks, Kylie!
Great Card Rhonda, I love your colour choices.
Thanks, Maheswari! I love how my color combination worked out.
A lovely card, Rhonda. The wreath looks great. Thanks for sharing.
Thanks, Libby!
beautiful wreath
Thanks, Katie!
Such a pretty card Rhonda! I love your colour combination! 🙂
Thanks, Deb! I love the colors I came up with!
What a terrific way to show off this bundle!
Thanks, Bonnie! I love this bundle because it is very versatile.
Such pretty colours Rhonda!
Thanks, Shelly! I love how the colors work together.