New Mini Catalog and Sale-A-Bration Begin Today!

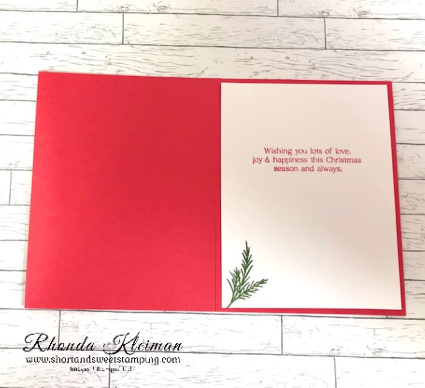
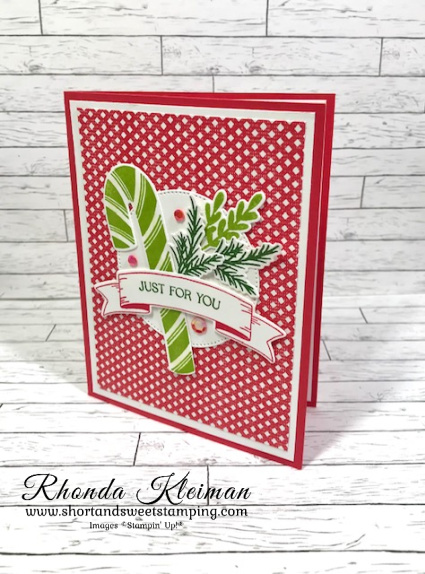
Hello and Happy New Year! The beginning of January is always an exciting time! Today, the new Mini Catalog goes live and you can start earning free products during the annual Sale-A-Bration promotion.

Click here to view the January-April 2023 Mini Catalog online

Here are several short videos you can watch to learn more about products in the catalog.

Brand New Bundles Now Available

New Mini Catalog Designer Series Paper

Fancy Flora Suite

Regency Park Suite

Click here to view the brochure online

Select free items of your choice with every $50 and $100 purchase.

Here are a few short videos you can watch to learn more about the Sale-A-Bration promotion

Sale-A-Brate With Designer Series Paper

Earn Free Stamp Sets During Sale-A-Bration

Join During Sale-A-Bration for Exclusive Deals

Now is a great time to join Stampin’ Up! Choose from one of these three options, as outlined on page 18 in the Sale-A-Bration brochure. Free shipping is included.

Option 1 – Select the exclusive Boho Blue Mini Stampin’ Cut & Emboss Machine ($63 value) plus your choice of $175 of Stampin’ Up! products for only $129.

Option 2 – Select the original white Mini Stampin’ Cut & Emboss Machine ($63 Value) plus your choice of $175 of Stampin’ Up! products for only $129.

Option 3 – Your choice of $175 of Stampin’ Up! products for only $99.

You can be a happy discount shopper or build a business – the choice is yours! I’d love to have you join my team. For additional information about the benefits of joining, click here.

Thanks for stopping by today!

Place an online order between $50 and $149 and use this host code for January. You will receive a free gift from me the following month.  If your order is $150 or more DO NOT use the host code. You will qualify for Stampin’ Rewards.

Happy Chanukah Cards

Hello!

Today is the seventh and next-to-last day of Chanukah. Here are two of the cards I designed to send to family and friends. Since Stampin’ Up! hasn’t had a Chanukah stamp set in many years I have had to purchase stamp sets from other companies. This year I purchased a new stamp set and coordinating dies from Honey Bee. I use Stampin’ Up products such as cardstock, Designer Series Paper and Specialty Papers, ink and embellishments. I also use retired products that I’ve kept, knowing that they work well with my limited blue, silver and gold color palette. This year I used Starry Sky, one of the 2022-2024 In Colors in several of the cards. It is such a bright and pretty blue and it worked beautifully. I also used greetings from the Brightest Glow stamp set in the July-December 2022 Mini Catalog. I loved that many of the greetings, while intended for Christmas cards, would be perfect for my cards because Chanukah is also known as the Festival of Lights and some of the greetings include the word “light.”

Here is how I made this card.

  • Card base – cut a piece of Basic White Thick cardstock at 5 1/2″ x 8 1/2″, score at 4 1/4″, fold and crease with a bone folder.
  • Cut a piece of the variegated paper from the Sun Prints Designer Series Paper at 4″ x 5 1/4″ and run through a die cutting machine with the largest Deckled Edge Rectangle die. Adhere to card base.
  • Cut a piece of the silver dot paper from the Silver & Gold Specialty Paper at 3″ x 4 1/4″ and run through die cutting machine with the third largest Deckled Edge Rectangle Die and adhere to card front. This DSP was a free Sale-A-Bration item earlier this year.
  • Cut a piece of Basic White cardstock at 2 3/4″ x 4 1/4″ and run through die cutting machine with the fourth largest Deckled Edge Rectangle Die. Flick Wink of Stella and Night of Navy and Starry Sky ink onto piece with Stampin’ Blends.
  • To make the candles, cut 1/2″ strips of the Starry Sky paper from the 2022-2024 In Color 6″x6″ Glimmer Paper and back with 1/2″ pieces of an adhesive sheet. For the flames, cut a scrap piece of Silver Foil Paper and back with an adhesive sheet. Use scrap pieces of Basic White cardstock for the candle backing pieces. Use the candle and flame dies from the Sentiment Silhouettes Dies. Die cut nine candles and nine backing pieces. Adhere together. Cut nine flames. Arrange candles on the Basic White Deckled Edge Rectangle piece and adhere with liquid glue. Adhere candle flames.
  • Stamp greeting with Starry Sky ink at bottom of the piece. The greeting I used is from the Honey Bee stamp set. Adhere to card front with Stampin’ Dimensionals.
  • Stamp greeting with Starry Sky ink on inside of card.

Here is how I made this card. I got the idea from Pinterest and apologize for not remembering who it came from. I had thought of using DSP strips for the candles and this design shows off the DSP very nicely.

  • Card base – cut a piece of Starry Sky cardstock at 5 1/2″ x 8 1/2″, score at 4 1/4″, fold and crease with a bone folder.
  • Cut a piece of Basic White cardstock at 4 1/8″ x 5 3/8″. Run through embossing machine with the Peacock Embossing Folder (retired) and adhere to card front. I love this folder and it looks like flames!
  • Cut eight strips of Designer Series Paper at 3/8″ x 3″ and one strip at 1/2″ x 3″. I used paper from the Sun Prints DSP and the 2022-2024 In Color 6″x6″ DSP. Arrange the strips on the card front, placing the 1/2″ strip in the middle. Adhere with liquid glue.
  • Make the flames by using any bird punch that has a separate wing. I used a retired punch to do this. Use a scrap piece of Gold Foil paper and punch nine pieces. Adhere with either liquid glue or a glue dot.
  • Stamp greeting with Starry Sky ink on scrap piece of Basic White cardstock. Run through die cutting machine with the smallest label die from the Seasonal Labels die set. Adhere over candles with Stampin’ Dimensionals.
  • Cut a piece of Basic White cardstock at 4″ x 5 1/4″ and stamp a greeting from the Brightest Glow stamp set with Starry Sky ink. Adhere to inside of card.

Thanks for stopping by today!

Place an online order between $50 and $149 and use this host code for December. You will receive a free gift from me the following month.  If your order is $150 or more DO NOT use the host code. You will qualify for Stampin’ Rewards.

Product List

Leaves of Holly Card

Hello!

Today, I’m posting my last Christmas card for the season and it is from the Boughs of Holly Suite. I had big plans to do many more cards with this beautiful suite, but you know what they say about the best laid plans……… I didn’t get around to using much of the Boughs of Holly DSP, however, I think this is an elegant card, even without it. I chose to use Very Vanilla cardstock rather than Basic White to give a richer look. I used the Merry Melody 3D Embossing Folder for the background. This folder is one of my all-time favorites and I will never part with it!!

Here is how I made the card.

  • Card base – Cut a piece of Cherry Cobbler cardstock at 5 1/2″ x 8 1/2″, score at 4 1/4″, fold and crease with a bone folder.
  • Cut a piece of Very Vanilla cardstock at 4″ x 5 1/4″ and run through a die cutting and embossing machine with the Merry Melody 3D Embossing Folder. Adhere to card front.
  • Cut a piece of Very Vanilla cardstock at 3″ x 4″ and using the leaf label die from the Holly Berry Dies, run through die cutting machine. Run a scrap piece of Old Olive cardstock through die cutting machine with the double leaf die. Adhere to the leaves on the label.
  • Run small scraps of Old Olive and Evening Evergreen cardstock through die cutting machine with the sprig die. Adhere behind the leaves on label. Adhere label to card front with Stampin’ Dimensionals.

  • Run a scrap piece of Cherry Cobbler cardstock through die cutting machine with the berry die. Die cut the berry accent piece with a scrap piece of Vanilla Glimmer Paper from the Glimmer Specialty Paper. Adhere to berries. Adhere to label.
  • Die cut the smaller label with a scrap piece of Very Vanilla cardstock and stamp greeting with Cherry Cobbler ink. Adhere to leaf label.
  • Embellish card front with several Cherry Cobbler Festive Pearls.
  • Cut another piece of Very Vanilla cardstock at 4″ x 5 1/4″, stamp greeting and adhere to inside of card.

Thanks for stopping by today!

Save up to 60% on retiring products from the July-December Holiday Mini Catalog starting today.

Click here to view the retiring products list

Click here to view the list of carryover products that will still be available after the Mini Catalog retires

The Clearance Rack has been refreshed and lots of products have been added! Click here to check it out. I just did a quick check and there are still lots of great items available but remember that availability is only while supplies last!

Place an online order between $50 and $149 and use this host code for December. You will receive a free gift from me the following month.  If your order is $150 or more DO NOT use the host code. You will qualify for Stampin’ Rewards.

Product List

Free Shipping Day December 15

Hello!

Stampin’ Up! has announced a free 24-hour shipping day for all orders of $75 or more on December 15th. Ordering begins at 12:00am and ends at 11:59pm Mountain Time. Please be advised that due to increased shipping times and possible shipping delays during the month of December, we can’t guarantee delivery before Christmas.

Thanks for stopping by today!

Place an online order between $50 and $149 and use this host code for December. You will receive a free gift from me the following month.  If your order is $150 or more DO NOT use the host code. You will qualify for Stampin’ Rewards.

Sweet Candy Canes

Hello!

Today’s card features the Sweetest Christmas Suite Collection, which is a mega suite containing two stamp & die bundles, along with coordinating Designer Series Paper and embellishments. I’ve been busy holding in-person holiday card classes for the last several weeks and finally have time to start posting a few of the projects.

Here is how I made the card.

  • Card base – cut a piece of Sweet Sorbet cardstock at 5 1/2″ x 8 1/2″, score at 4 1/4″, fold and crease with a bone folder.
  • Cut a piece of Basic White cardstock at 4″ x 5 1/4″ and adhere to card front. Cut a piece of Sweetest Christmas Designer Series Paper at 3 3/4″ x 5″. I used the sheet with the Sweet Sorbet and white diamond pattern. Adhere to card front.
  • Stamp candy cane from the Sweet Candy Canes stamp set with Granny Apple Green ink on piece of Basic White cardstock. Run through die cutting machine. Add some glimmer with Wink of Stella.
  • Stamp two pine leaves with Garden Green ink and one leaf with Granny Apple Green ink on scrap piece of Basic White cardstock. Run through die cutting machine.
  • Stamp single banner from the Christmas Banners stamp set with Sweet Sorbet ink on scrap piece of Basic White cardstock. Stamp greeting with Garden Green ink. Run through die cutting machine.
  • Cut a 3″ square of Basic White cardstock and run through die cutting machine with the 2nd largest circle from the Stylish Shapes Dies. Adhere to card front.
  • Adhere the three leaves to the circle with Mini Stampin’ Dimensionals. Adhere the candy cane. Adhere the banner with Stampin’ Dimensionals. Add a few Sweet Sorbet sequins from the Adhesive Backed Seasonal Sequins.
  • Cut a piece of Basic White cardstock at 4″ x 5 1/4″. Stamp greeting from the Sweet Candy Cane stamp set with Sweet Sorbet ink. Stamp a pine leaf with Garden Green ink in lower left corner. Adhere to inside of card.

Thanks for stopping by today!

Save up to 60% on retiring products from the July-December Holiday Mini Catalog starting today.

Click here to view the retiring products list

Click here to view the list of carryover products that will still be available after the Mini Catalog retires

The Clearance Rack has been refreshed and lots of products have been added! Click here to check it out. Remember that availability is only while supplies last!

Place an online order between $50 and $149 and use this host code for December. You will receive a free gift from me the following month.  If your order is $150 or more DO NOT use the host code. You will qualify for Stampin’ Rewards.

Product List

Retiring List and Clearance Rack Sale Begin Today

Save up to 60% on retiring products from the July-December Holiday Mini Catalog starting today.

Click here to view the retiring products list

Click here to view the list of carryover products that will still be available after the Mini Catalog retires

The Clearance Rack has been refreshed and lots of products have been added! Click here to check it out. Remember that availability is only while supplies last!

Place an online order between $50 and $149 and use this host code for December. You will receive a free gift from me the following month.  If your order is $150 or more DO NOT use the host code. You will qualify for Stampin’ Rewards.