

Thank you for your business this year. May the joy you get from stamping and cardmaking bring joy to those you share your creations with this holiday season.
Wishing you and yours a very Happy Thanksgiving!

Thank you for your business this year. May the joy you get from stamping and cardmaking bring joy to those you share your creations with this holiday season.
Wishing you and yours a very Happy Thanksgiving!
Hello!
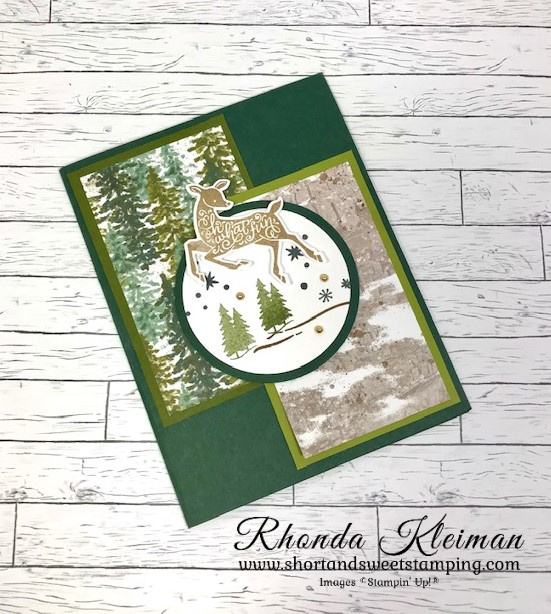
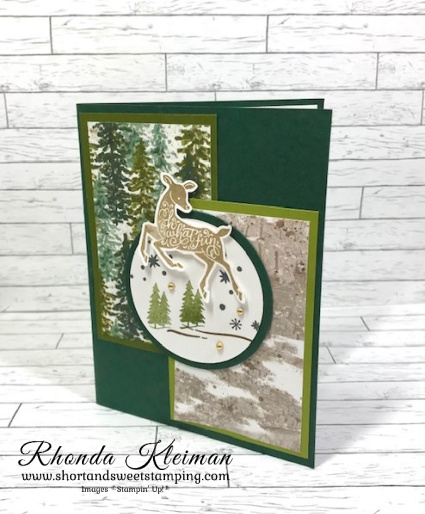
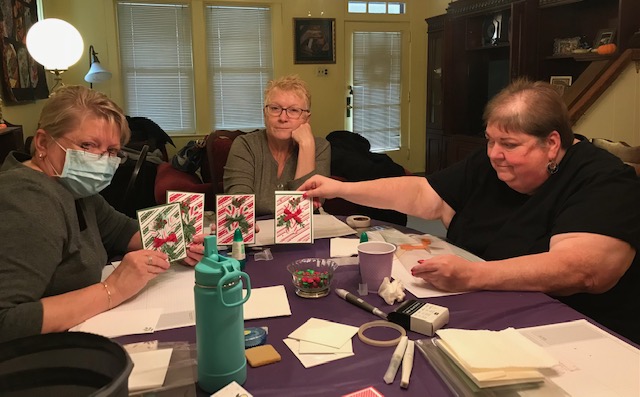
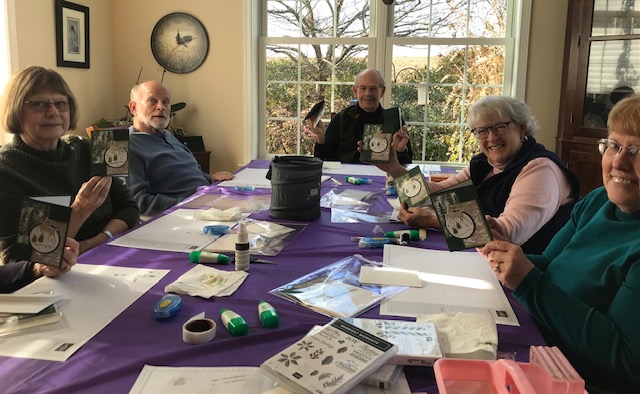
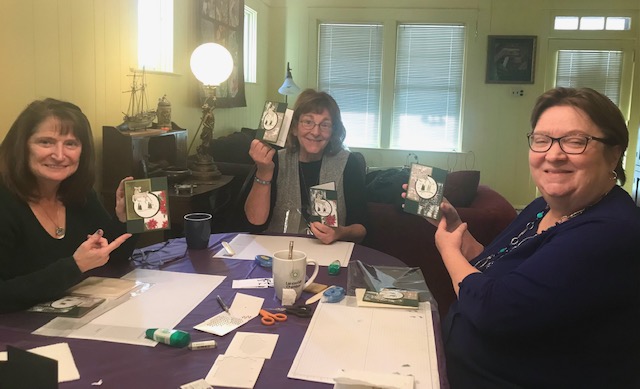
Today’s card features the Peaceful Deer stamp set and coordinating Deer Builder Punch. The stamp set and punch were introduced as a bundle in the 2021 Holiday Mini Catalog and I didn’t purchase it at the time. I was happy to see that it carried over into the current Annual Catalog so I was able to purchase it this year. It is such a nice stamp set, filled with lovely images, and yes, you can create many peaceful scenes with these stamps. We made this card in the Christmas card classes I held last week.
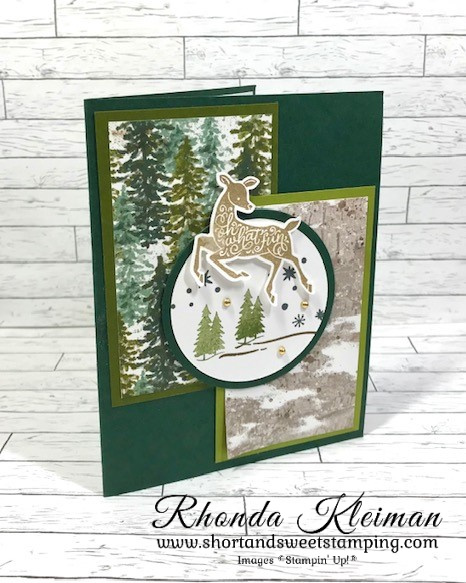
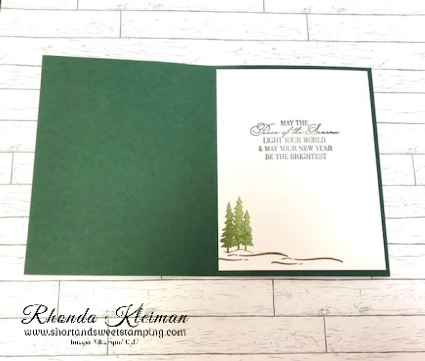
Here is how I made the card.
Here are a few pictures from the three classes I held. several people were MIA when I took the photos!
Thanks for stopping by today!


This month, we celebrate the people in your life who mean the world to you with Timeless Greetings—an all-occasion card kit you can use year-round! This unique kit features an elegant pocket watch and globe design in neutral colors, along with heartfelt sentiments that are sure to inspire lasting memories. These cards are perfect for wishing happy birthday, saying thank you or sending a friendship note in style, so make sure to let family and friends know just how special they are! The kit contains enough supplies to create eight cards, two each of four different designs; envelopes; printed card bases, die cuts, embellishments; stamp set and clear block; coordinating colors: Basic Black, Basic Gray, Cajun Craze, Crumb Cake, Evening Evergreen, Soft Suede. Cost of the kit is $21USD, Item #161062. Click here to purchase the kit from my online store.


Create fun gift card holders to help you celebrate your special occasions all year long! Personalize each gift with these reversible boxes and paper bands for a unique design every time. This kit comes with enough supplies for you to make 16 different gift card holders—2 each of 8 designs. It also has an all-occasion stamp set and enough paper pieces to make your craft really pop! Coordinating Stampin’ Up! colors: Balmy Blue, Basic Gray, Blushing Bride, Calypso Coral, Crushed Curry, Garden Green, Tahitian Tide. No matter what the occasion or who the recipient is, this is a coordinated paper craft that everyone will love and appreciate!
Plus, this month you can take your crafting even further with a special add-on! Give a gift card and a personalized card with the Good Things Cards & Envelopes add-on. You get 20 cards (5 each of 4 designs) and 20 coordinating envelopes. Add-ons are live during the subscription period but will only be available while supplies last, so don’t wait!

Place an online order between $50 and $149 and use this host code for November. You will receive a free gift from me the following month. If your order is $150 or more DO NOT use the host code. You will qualify for Stampin’ Rewards.
Product List  | ||
 | ||
 | ||
 |  | |
 |  |  |
 |

Stampin’ Up! has announced a Seasonal Sale that starts tomorrow, November 15 and ends on November 18. Save on the following items from the Annual Catalog.
Click here to view a list of all of the sale products and discounted prices.
Now is a great time to stock up on basic supplies or perhaps that stamp set or dies you have on your wish list!
Thanks for stopping by today!
Place an online order between $50 and $149 and use this host code for November. You will receive a free gift from me the following month. If your order is $150 or more DO NOT use the host code. You will qualify for Stampin’ Rewards.
Hello!
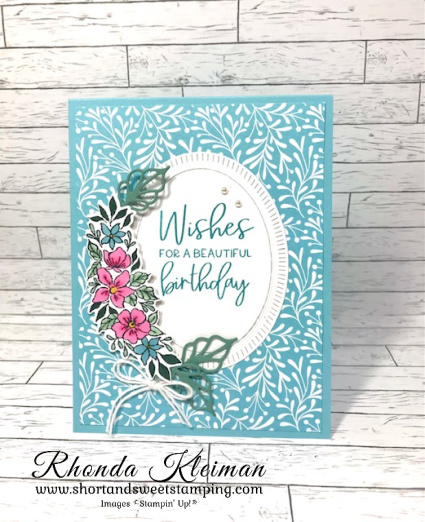
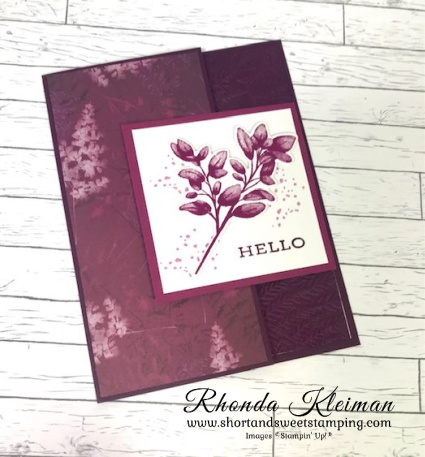
The Fitting Florets Collection is now available! The collection consists of the Framed Florets Bundle, Framed & Festive Stamp Set, Fitting Florets Designer Series Paper and Gold Adhesive Backed Swirls. The Framed Florets Bundle will be carrying over into the January-June 2023 Mini Catalog. The Framed & Festive stamp set, DSP and gold swirls will be available until January 4, 2023 or while supplies last. This is a birthday card I made with the bundle and DSP.

Here is how I made the card.


Thanks for stopping by today!
Place an online order between $50 and $149 and use this host code for November. You will receive a free gift from me the following month. If your order is $150 or more DO NOT use the host code. You will qualify for Stampin’ Rewards.
Product List ") |  | |
| |  | |
 | ||
 |  | |
| | | |
 |  |

Hello and Happy Halloween! Today’s card features the Bewitching stamp set and coordinating Witches Hat Builder Punch. This is another one of the cards we made in my recent Halloween Card class and everyone loved making it! Sadly, the punch proved to be so popular that it is no longer available.
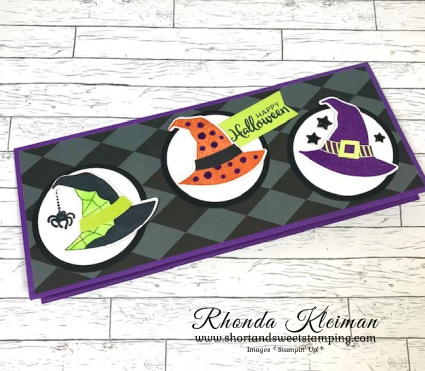
Here is how I made the card.
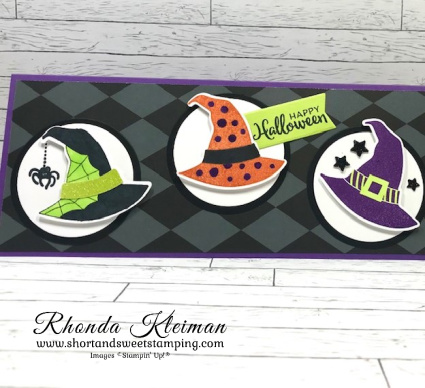


Wishing you a frightfully, delightful Halloween!
Thanks for stopping by today!

Today is the last day to take advantage of this great offer – when you purchase the Starter Kit you get to pick $155 worth of product for only $99 plus free shipping! You also get a free past Paper Pumpkin kit. Join as a happy discount shopper or as a business – the choice is yours! You might want to consider adding the beautiful new Fitting Florets Collection to the kit! A few other benefits of joining are: enjoy a 20%-25% discount on all orders as an active demonstrator, get to see new catalogs early and place pre-orders, attend in-person and virtual Stampin’ Up! events. I’d love to have you on my team! Click here for further information and to join.

Place an online order between $50 and $149 and use this host code for October. You will receive a free gift from me the following month. If your order is $150 or more DO NOT use the host code. You will qualify for Stampin’ Rewards.
Product List ") |  | |
| | ||
| | ||
 | ||
| | | |
| | | |
| |
Hello!
Today’s card features the Scary Silhouettes Dies from the holiday mini catalog. I’ve loved celebrating Halloween ever since I was a small child. I have made Halloween cards for years, but hadn’t offered a class for several years because my customers didn’t seem interested. However, I decided to offer a class this year and I got a great response, so was able to hold two sessions last week. This one of the cards we made and everyone had fun playing with the die cuts!
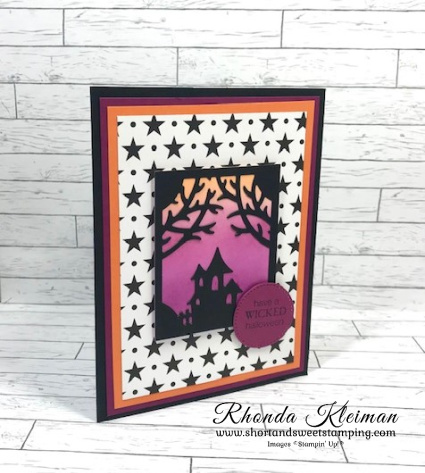
Here is how I made the card.

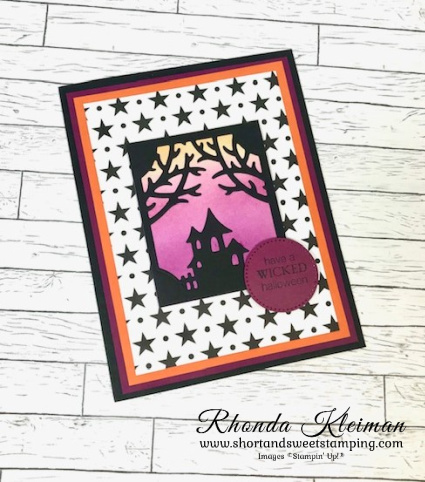

Thanks for stopping by today!
Sneak Peek
Stampin’ Up! has released a collection of products, Fitting Florets, that will be available for purchase beginning on November 1. Several of the products will only be available until January 4th, while supplies last: Fitting Florets DSP, Framed & Festive Stamp Sets, Gold Adhesive Backed Swirls. The following products are also available for purchase in the Mini Catalog starting January 2023: Framed Florets Bundle, Framed Florets Stamp Set, and Framed Florets Dies. Add just the right touch of elegance to any occasion, including Christmas and seasonal celebrations, with the sweet Fitting Florets Collection. From color schemes to sentiments and embellishments to dies, these unique products blend together so that your cards and crafts fit whatever occasion you might need. Send birthday wishes, express your gratitude, or spread Christmas cheer—with so many options to mix and match you’ll be set no matter the celebration all year!
Place an online order between $50 and $149 and use this host code for October. You will receive a free gift from me the following month. If your order is $150 or more DO NOT use the host code. You will qualify for Stampin’ Rewards.
Product List  |  | |
| | | |
 | ||
| | | |
| | | |
| |
Hello!
Today’s cards feature the Forever Fern stamp set and coordinating Forever Flourishing Dies, along with the Pretty Prints Designer Series Paper. I recently attended Stampapalooza, an online stamping retreat. One of the activities was a mystery project, where a series of clues were posted that included supplies needed, cutting and scoring dimensions, etc. I had an unopened package of Pretty Prints DSP waiting to be used, and once I decided on the DSP, the rest of the card quickly fell into place! I immediately thought that the Forever Fern stamp set and Fern 3D Embossing Folder would look great with the paper. The first card I made used Evening Evergreen as the main color and later on I went back and made two other cards with Blackberry Bliss and Bermuda Bay. Give this fun fold a try. It is easy to make and is also a great way to showcase DSP and coordinating stamps! I made a few Halloween cards using this fold too.
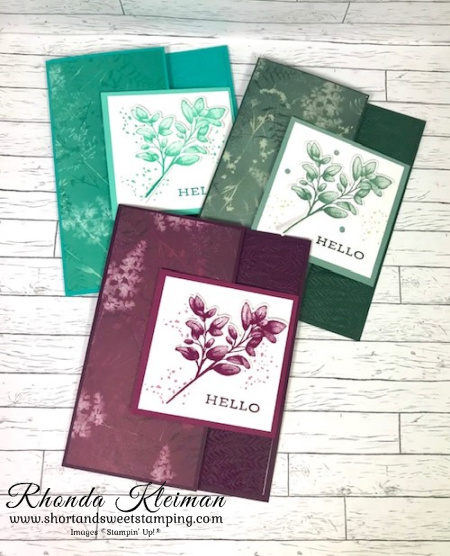
Here is how I made the cards,
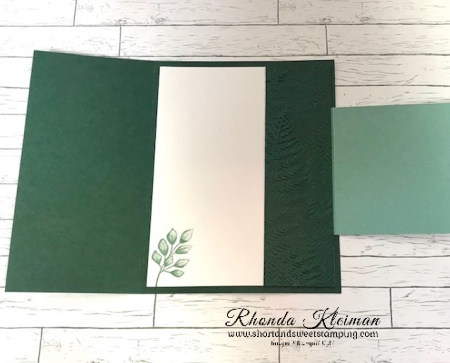
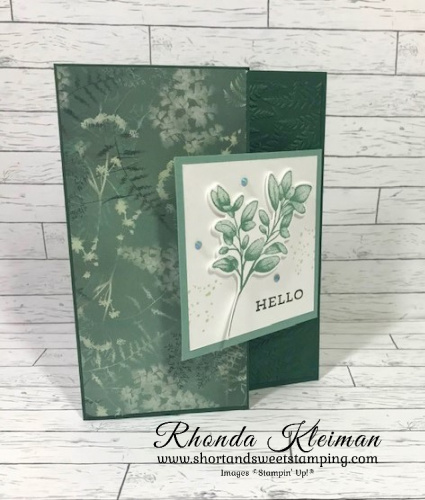
Colors used for this card: Cardstock: Evening Evergreen for card base, Soft Succulent for fun fold flap; Ink: Evening Evergreen for greeting, Soft Succulent for ferns, Soft Sea Foam for the speckles
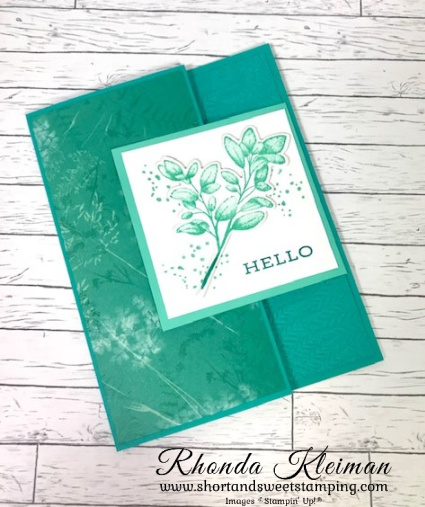
Colors used for this card: Cardstock: Bermuda Bay for card base, Coastal Cabana for fun fold flap; Ink: Evening Evergreen for greeting, Coastal Cabana for ferns, Pool Party for the speckles.
Colors used for this card: Cardstock: Blackberry Bliss for card base, Rich Razzleberry for fun fold flap; Ink: Blackberry Bliss for greeting, Rich Razzleberry for ferns, Fresh Freesia for the speckles.
Thanks for stopping by today!
Clearance Rack Refresh
Lots of new items were recently added to the clearance rack and they have been going fast! Sales are while supplies last! Click on the banner to check out the items that are still currently available in my online store
Now is a great time to consider joining Stampin’ Up! There is only one week remaining to take advantage of this great offer – when you purchase the Starter Kit you get to pick $155 worth of product for only $99 plus free shipping! You also get a free past Paper Pumpkin kit. Join as a happy discount shopper or as a business – the choice is yours! A few other benefits of joining are: enjoy a 20%-25% discount on all orders as an active demonstrator, get to see new catalogs early and place pre-orders, attend in-person and virtual Stampin’ Up! events. I’d love to have you on my team! Click here for further information and to join.
Place an online order between $50 and $149 and use this host code for October. You will receive a free gift from me the following month. If your order is $150 or more DO NOT use the host code. You will qualify for Stampin’ Rewards.
Product List  |  | |
| | ||
| | ||
| | | |
| | | |
")
")
 Designer Series Paper")


")
 Designer Series Paper")


")


 Designer Series Paper")
 Glimmer Paper")


")
 Designer Series Paper")


