Texture Chic Fun Fold-Kylie’s International Blog Highlights

Hello! For those of you in the US, I hope you have been enjoying the Labor Day weekend. I can’t believe it’s been almost a year since I last participated in Kylie Bertucci’s International Blog Highlights! Readers get to vote on their top five favorites in the gallery and the top 10 winners will get to participate in an International Blog Hop later this month. The theme is “thank you”.

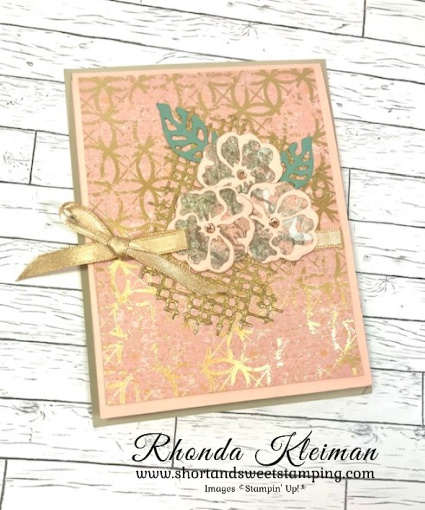
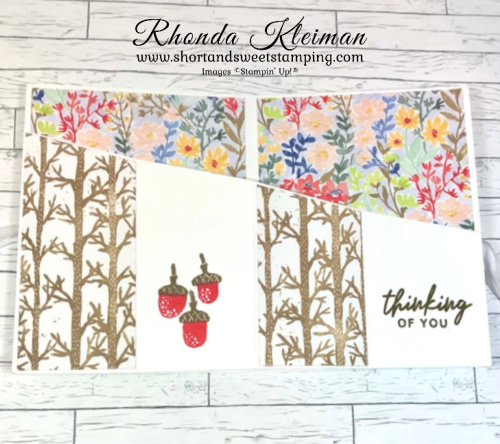
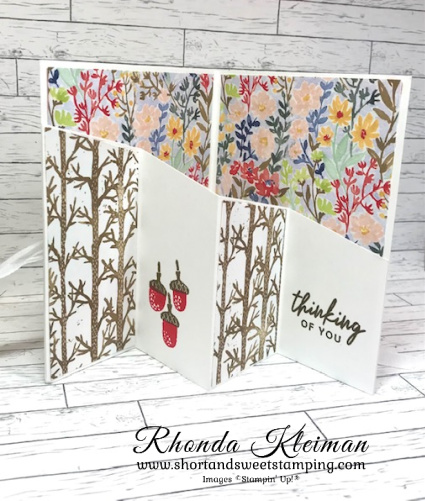
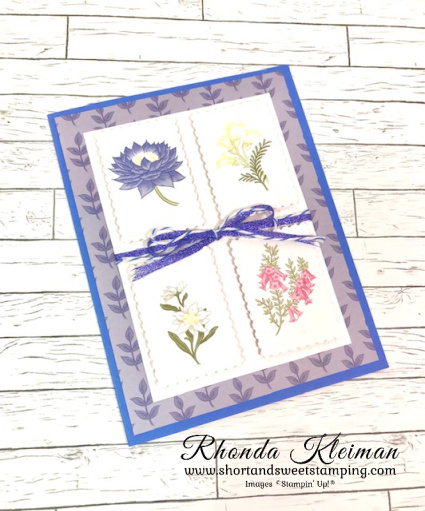
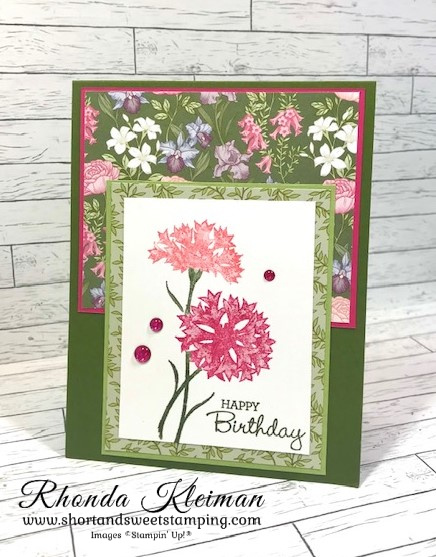
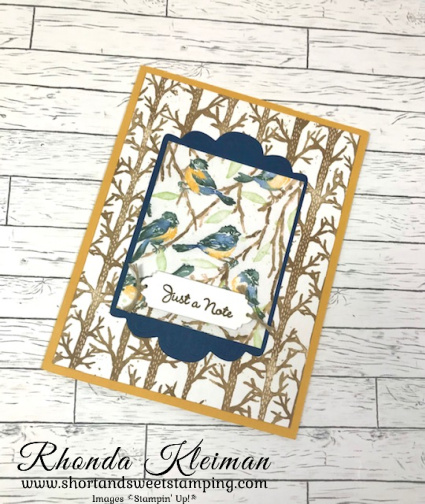
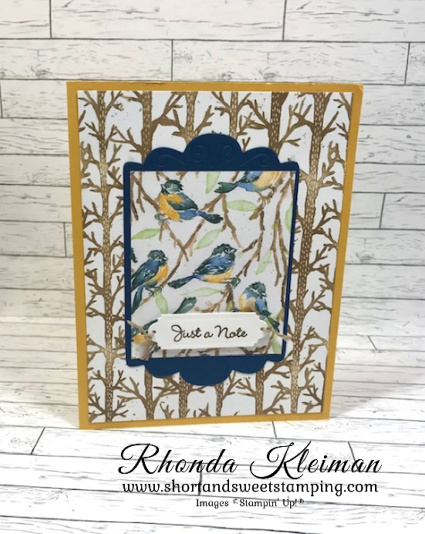
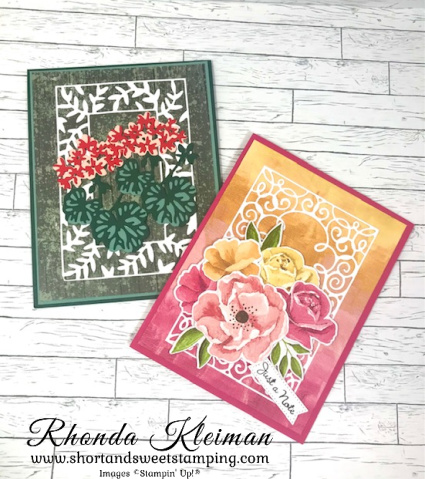
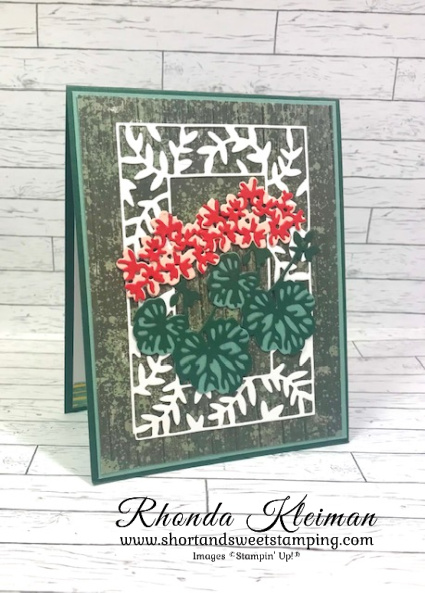
My card features the Texture Chic Suite from the annual catalog. It is my most favorite suite and is the first one I purchased when the new catalog was introduced. The card is a fun fold that really shows off the beautiful Designer Series Papers to their fullest. I found this fold when I was browsing through Connie Stewart’s blog and decided to give it a try for a class project I was working on last month.

Here is how I made the card.

  • Card base – Cut a piece of Sahara Sand cardstock at 4 1/4″ x 5 1/2″.
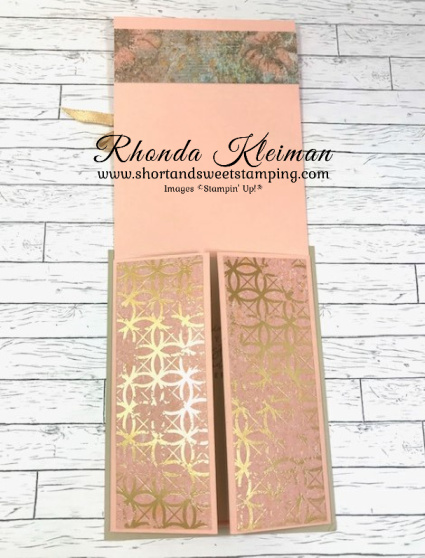
  • Cut a piece of Petal Pink cardstock at 4″ x 10 1/2″ and score at 5 1/4″. Fold and crease sharply with a bone folder
  • Cut two pieces of Petal Pink cardstock at 2 1/2″ x 5 1/2″ and score both pieces lengthwise at 1/2″. Fold and crease sharply with a bone folder. Adhere pieces to both sides to the back of the bottom half of the larger piece of Petal Pink cardstock. Adhere entire piece to the Sahara Sand card base.
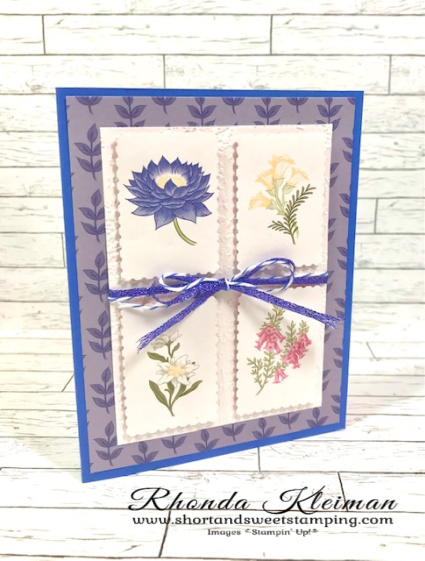
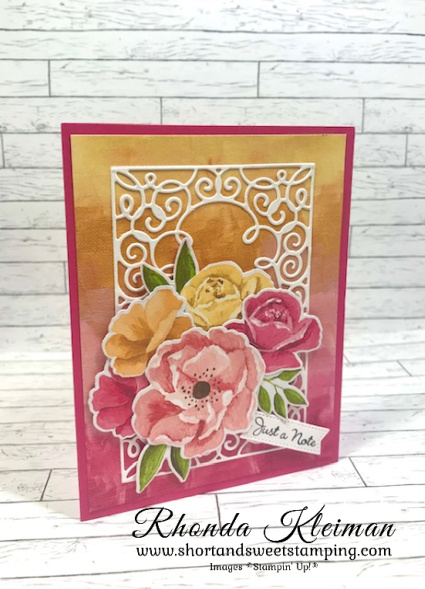
  • Cut a piece of Texture Chic Specialty Designer Series paper at 3 3/4″ x 5″. Cut a piece of Gold 1/4″ Shimmer Ribbon and tie into a bow around the DSP. Adhere to card front.
  • Prepare pieces for the card front collage. Cut a piece of Distressed Gold paper to fit the grid die from the Chic Dies. Cut a piece of an Adhesive Sheet to fit and adhere to paper. Run though the Stampin’ Cut & Emboss Machine. Adhere to card front over the ribbon. This piece will be the base for the collage.
  • Die cut two different leaf shapes from scrap pieces of Soft Succulent cardstock. Back the cardstock with Adhesive Sheet before running through die cutting machine.
  • Die cut three flower bases with scrap pieces of Texture Chic Specialty Designer Series Paper. Die cut three open flower accent pieces from scrap pieces of Petal Pink cardstock. Before die cutting, adhere pieces of Adhesive Sheet to each piece. Adhere the accent pieces to the flower bases.
  • Adhere leaf pieces to top part of the Distressed Gold grid piece. Arrange the three flowers and adhere with liquid glue . Add a Champagne Rhinestone to the center of each flower.
  • Cut four pieces of DSP at 1 3/4″ x 5″ for the fun fold side flaps. Select two different pieces of DSP. Adhere one set to the front of the flaps and the other set to the inside of the flaps.
  • Cut another piece of the DSP used for the inside flaps at 1 1/4″ x 4″ and adhere to inside upper part of the Petal Pink card flap.
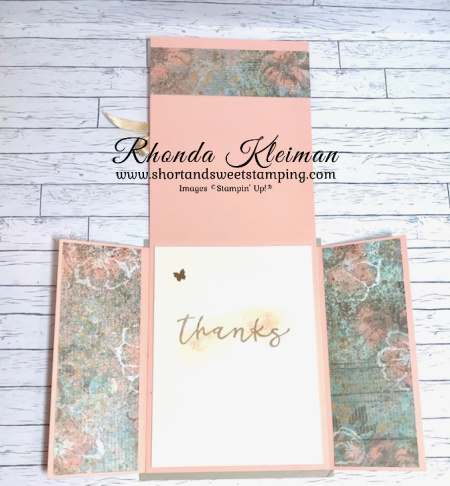
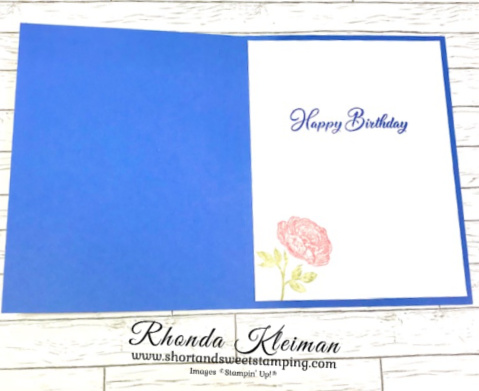
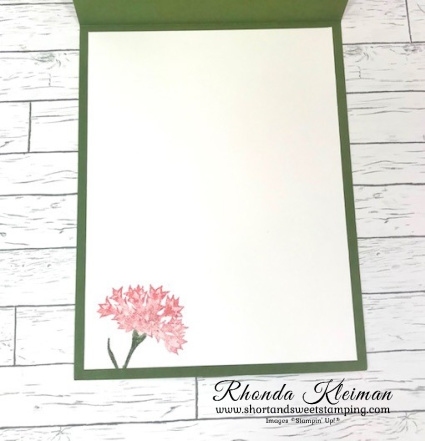
  • Cut a piece of Very Vanilla cardstock at 3 3/4″ x 5″. Stamp the swoosh image from the Season of Chic stamp set with Petal Pink ink, stamping off once before stamping onto the cardstock. Stamp the greeting with Sahara Sand over the swoosh image. Adhere a large Brushed Brass Butterfly to the upper left corner. Adhere piece to inside.

I’d be so appreciative if you would vote for my card! Click on the vote image below. Once you are in the gallery, click on the heart at the top right hand side of the picture as the hearts appear.

Thanks for stopping by today!

Place an online order between $50 and $149 and use this host code for September. You will receive a free gift from me the following month.  If your order is $150 or more DO NOT use the host code. You will qualify for Stampin’ Rewards.

Product List
Chic Dies
[158815]
$37.00
Paper Snips
[103579]
$11.00

Ringed With Nature Fun Fold Card

Hello!

This is the last day for Sale-A-Bration! Today’s card is another one that features the Ringed With Love Designer Series Paper that is still available as a free gift with a $50 purchase. This card is a Z fun fold that I came across on Lisa Curcio’s blog and YouTube channel where she shows how to make it. I love this fold because it is a great way to show off any Designer Series Paper and while it looks difficult to make, it is actually very easy! This card also uses the Ringed With Nature Bundle that coordinates with the DSP.

Click on the blog link above to go to Lisa Curcio’s post for all of the cutting dimensions and instructions on how to put the card together. Here is how I made my card.

  • Card base – Thick Basic White cardstock 5 1/2″ x 8 1/2″, score at 4 1/4″, fold and crease sharply with a bone folder.
  • Cut piece of Parakeet Party cardstock at 4 1/8″ x 5 3/8″. Cut piece of Ringed With Love DSP at 4″ x 5 1/4″ and adhere to cardstock. Adhere piece to card front.
  • Die cut and emboss one of the larger tree rings from the Tree Rings Hybrid Embossing Folder with a piece of Soft Suede cardstock. Die cut several different leaves with scrap pieces of Crushed Curry, Evening Evergreen and Parakeet Party cardstock. Adhere to tree ring with Mini Glue Dots.
  • Adhere two pieces of a contrasting piece of DSP cut at 4″ x 5 1/4″ to both sides of the inside of the card base.
  • Cut a piece of Thick Basic White cardstock for the inside Z fold as per Lisa Curcio’s instructions.
  • Cut strip of the tree trunk DSP and follow the instructions for cutting the strips before adding them to the fold.
  • Stamp the acorns from the Ringed With Nature stamp set. First stamp the bottom of the acorns with Poppy Parade ink and then stamp the acorn tops with Soft Suede ink. Stamp the greeting on the smallest panel with Soft Suede ink. Adhere to inside of card as instructed.
  • To finish off the card, adhere the tree ring to the card front with two Stampin’ Dimensionals at the top and two at the bottom, leaving space in the middle of the tree ring. Cut a length of ribbon at 18″ and slide one end through the middle of the tree ring. I used some retired 1/2″ white ribbon from my stash. You can use one or two Mini Glue Dots to adhere the ribbon at the back of the card in order to keep it in place. Tie ribbon into either a bow or a double knot, which is how I tied it.

Thanks for stopping by today!

Select free items with every $50 or $100 purchase. There is no limit on the number of times you can earn free items. Please note that all SAB prroducts are only available while supplies last. The Pool Party and Soft Sea Foam Cards & Envelopes (Item #159940), Tree Lot Dies (Item #159938) and Hippo Dies (Item #159928) are no longer available.

The Brushed Metallic Cardstock (Item #163103) and Silver Foil Specialty Pack (Item #163096) are no longer available as free Sale-A-Bration items, however, they are still available for purchase in the annual catalog. Brushed Metallic Cardstock, Item #153524, $15.00 and Silver Foil Specialty Pack, Item #156457, $10.00.

This new Cozy & Bright Card Kit is now available for purchase. The kit has everything you need to make twelve 5 1/2″ x 4 1/4″ cards. It includes a photopolymer stamp set, acrylic block, adhesives, preprinted card bases, die cuts and stickers, Poppy Parade Stampin’ Spot, gold foil accents, preprinted envelopes, linen thread, as well as step-by-step instructions. Product colors: Cajun Craze, Early Espresso, Evening Evergreen, Garden Green, Poppy Parade, Pumpkin Pie. The cost of the kit is $23.00 and the item number is 160338. Click here to place your order in my online store. This kit is available only while supplies last.

Place an online order between $50 and $149 and use this host code for August. You will receive a free gift from me the following month.  If your order is $150 or more DO NOT use the host code. You will qualify for Stampin’ Rewards.

Product List
Paper Snips
[103579]
$11.00

Wonderful World Postage Stamp Card

Hello!

Tomorrow is the last day of Sale-A-Bration! I have one more card for you featuring the Wonderful World Stamp Set and Designer Series Paper that is still available as a free gift with a $100 purchase.

Here is how I made the card.

  • Card base – Cut a piece of Orchid Oasis cardstock at 5 1/2″ x 8 1/2″, score at 4 1/4″ and crease with a bone folder.
  • Cut a piece of the Wonderful World DSP at 4″ x 5 1/4″ and adhere to card front.
  • Cut a piece of Basic White cardstock at 3 1/4″ x 4 1/2″ and run through the Stampin’ Cut & Emboss Machine with the Timeworn Type 3D Embossing Folder.
  • Use the Rectangular Postage Stamp Punch to cut four assorted flowers from the DSP sheet with rows of different flowers. Adhere the pieces to the embossed piece with Mini Stampin’ Dimensionals in the four corners of each of the pieces, spacing them evenly and leaving some extra space in the middle in order to tie the ribbon.
  • Cut a length of Orchid Oasis 1/8″ Metallic Woven Ribbon and another with the Orchid Oasis Bakers Twine from the 2022-2024 Bakers Twine Pack. Tie into a bow around the middle of the floral piece and trim ends. Adhere piece to card front.
  • Cut a piece of Basic White cardstock at 4″ x 5 1/4″. Stamp the rose image from the Wonderful World stamp set in the bottom left corner by using the direct to rubber technique. Color the flower part of the stamp with a Flirty Flamingo Stampin’ Write Marker and the leaves with a Pear Pizzazz Marker. Huff on the stamp to activate the ink and stamp in the corner. I used the birthday greeting from the Go To Greetings stamp set and stamped with Orchid Oasis ink. Adhere to inside of card.

This was a quick and easy card to put together.

Thanks for stopping by today!

Select free items with every $50 or $100 purchase. There is no limit on the number of times you can earn free items. Please note that all SAB prroducts are only available while supplies last. The Pool Party and Soft Sea Foam Cards & Envelopes (Item #159940), Tree Lot Dies (Item #159938) and Hippo Dies (Item #159928) are no longer available.

The Brushed Metallic Cardstock (Item #163103) and Silver Foil Specialty Pack (Item #163096) are no longer available as free Sale-A-Bration items, however, they are still available for purchase in the annual catalog. Brushed Metallic Cardstock, Item #153524, $15.00 and Silver Foil Specialty Pack, Item #156457, $10.00.

Get your Halloween crafting on with the Spooky Treats Paper Pumpkin Kit. This month’s kit includes everything you need to make 18 adorable treat boxes—that’s 6 each of 3 unique designs. This all-inclusive kit includes printed box bases and tops, die-cut paper pieces, adhesives, and an Orchid Oasis Classic Stampin’ Spot. This kit’s stamp set puts the TREAT in trick-or-treat with fun, Halloween-themed sentiments and designs. Embrace the spooky season with ghost, bat, spider, and star images. This kit also includes a special peek-through box top on one of the box designs. Coordinating Stampin’ Up! colors: Basic Black, Gray Granite, Orchid Oasis, Fresh Freesia, Crushed Curry, Pumpkin Pie. For further information and to subscribe to the August kit, visit my Paper Pumpkin website here.

Place an online order between $50 and $149 and use this host code for August. You will receive a free gift from me the following month.  If your order is $150 or more DO NOT use the host code. You will qualify for Stampin’ Rewards.

Product List
Paper Snips
[103579]
$11.00

Wonderful World Card

Hello!

Today’s card features the Wonderful World Stamp set and coordinating Designer Series Paper, another Sale-A-Bration free gift you can earn with a $100 purchase. This is a lovely set of products and the colors of the DSP are right up my alley – pinks, purples and greens!

Here is how I made the card.

  • Card base – cut a piece of Mossy Meadow cardstock at 4 1/4″ x 11″, score at 5 1/2″, fold and crease with a bone folder.
  • Cut one piece each of Melon Mambo and Pear Pizzazz cardstock at 3 1/4″ x 4″ each. Cut two pieces of Wonderful World Designer Series Paper at 3 1/8″ x 3 7/8″ and adhere to cardstock pieces. Adhere to card front.
  • Cut a piece of Basic White cardstock at 2 3/4″ x 3 1/2″. Use the direct to rubber technique and Stampin’ Write Markers to color the large floral image stamp from the Wonderful World stamp set. Color the top flower with Flirty Flamingo, larger flower with Melon Mambo and stems with Mossy Meadow. Huff on the stamp to reactivate the ink and stamp onto the piece of white cardstock. This is a Distinktive stamp which is made to create realistic shading on the image, so there will be areas of light and dark.
  • Stamp greeting with Mossy Meadow ink at bottom of card. I used the birthday greeting from the Pansy Patch stamp set. Adhere to card front. Embellish with a few Melon Mambo dots from the Glossy Dots Assortment.
  • Cut a piece of Basic White cardstock at 4″ x 5 1/4″. Use the large floral image stamp and color the top flower with Flirty Flamingo and the top part of the stem with Mosy Meadow. Stamp in bottom left corner and adhere to inside of card.

Thanks for stopping by today!

Select free items with every $50 or $100 purchase. There is no limit on the number of times you can earn free items. Please note that all SAB prroducts are only available while supplies last. The Pool Party and Soft Sea Foam Cards & Envelopes (Item #159940) and the Tree Lot Dies (Item #159938) are no longer available.

The Brushed Metallic Cardstock (Item #163103) is no longer available as a free Sale-A-Bration item, however, it is still available for purchase in the annual catalog, Item #153524, $15.00.

This new Cozy & Bright Card Kit is now available for purchase. The kit has everything you need to make twelve 5 1/2″ x 4 1/4″ cards. It includes a photopolymer stamp set, acrylic block, adhesives, preprinted card bases, die cuts and stickers, Poppy Parade Stampin’ Spot, gold foil accents, preprinted envelopes, linen thread, as well as step-by-step instructions. Product colors: Cajun Craze, Early Espresso, Evening Evergreen, Garden Green, Poppy Parade, Pumpkin Pie. The cost of the kit is $23.00 and the item number is 160338. Click here to place your order in my online store. This kit is available only while supplies last.

Place an online order between $50 and $149 and use this host code for August. You will receive a free gift from me the following month.  If your order is $150 or more DO NOT use the host code. You will qualify for Stampin’ Rewards.

Product List
Paper Snips
[103579]
$11.00

Rings of Love Card

Hello!

The month of August is flying by so quickly and it means that Sale-A-Bration will be coming to an end on August 31st. I’ve been so busy with in-person classes that I haven’t had time to post all of the cards I’ve made this month, so for the next few days I’ll be posting cards that use Sale-A-Bration products. Today’s card features the Ringed With Nature stamp set from the July-December 2022 Mini Catalog and the Rings of Love Designer Series Paper that you can earn for free with a $50 purchase during Sale-A-Bration. The Ringed With Nature bundle is such a fun bundle work with and the DSP works so beautifully with it. This card is quick and easy to put together.

Here is how I made the card.

  • Card base – cut a piece of Crushed Curry cardstock at 5 1/2″ x 8 1/2″, score at 4 1/4″, fold and crease with a bone folder.
  • Cut a piece of the Rings of Love DSP with the tree branches at 4″ x 5 1/4″ and adhere to card front.
  • Cut a piece of the DSP with the birds at 2 1/2″ x 3″.
  • Cut a piece of Night of Navy cardstock at 3 1/4″ x 4 1/2″ and run through the Stampin’ Cut and Emboss Machine with the the scalloped frame from the Fabulous Frames dies. Adhere frame to card front. Adhere the piece of bird DSP to the inside of the frame. The top and bottom of the DSP will fit into the frame and the sides will slightly overlap the sides of the frame.
  • Run a scrap piece of Basic White cardstsock through the Cut & Emboss Machine with the label die from the Stylish Frames dies. Stamp greeting with Soft Suede ink. I used one of the greetings from the Go To Greetings stamp set. This is such a wonderful set of greetings! I just love the mix of different type fonts, sizes and basic greetings that work for all occasions.
  • For a bit of embellishment, I cut two pieces of the Crumb Cake Bakers Twine from the Essentials Pack at 2 1/2″ and threaded each one through the holes on the sides of the tag, tied double knots and trimmed the ends. Adhere tag to card front with Mini Stampin’ Dimensionals.
  • Cut a piece of Basic White cardstock at 4″ x 5 1/4″. Stamp the stem from the Ringed With Nature stamp set with Soft Suede ink in bottom left corner. Stamp the mushroom caps with Crushed Curry ink on top of the stems. Adhere to inside of card.
Rings of Love DSP

Thanks for stopping by today!

Select free items with every $50 or $100 purchases. There is no limit on the number of times you can get free items. Please note that all SAB products are only available while supplies last. The Pool Party & Soft Sea Foam Cards & Envelopes (item #159940) and the Tree Lot Dies (item #159938) are no longer available.

The Brushed Metallic Cardstock (163103) is no longer available as a free Sale-A-Bration item, however, it is still available for purchase in the annual catalog, Item #153524, $15.00.

Saturday, October 1, 2022 – Save the Date!

Get your Halloween crafting on with the Spooky Treats Paper Pumpkin Kit. This month’s kit includes everything you need to make 18 adorable treat boxes—that’s 6 each of 3 unique designs. This all-inclusive kit includes printed box bases and tops, die-cut paper pieces, adhesives, and an Orchid Oasis Classic Stampin’ Spot. This kit’s stamp set puts the TREAT in trick-or-treat with fun, Halloween-themed sentiments and designs. Embrace the spooky season with ghost, bat, spider, and star images. This kit also includes a special peek-through box top on one of the box designs. Coordinating Stampin’ Up! colors: Basic Black, Gray Granite, Orchid Oasis, Fresh Freesia, Crushed Curry, Pumpkin Pie. For further information and to subscribe to the August kit, visit my Paper Pumpkin website here.

Place an online order between $50 and $149 and use this host code for August. You will receive a free gift from me the following month.  If your order is $150 or more DO NOT use the host code. You will qualify for Stampin’ Rewards.

Product List
Paper Snips
[103579]
$11.00

Fancy Frames Cards

Hello!

Today I have two cards for you that feature the Fancy Frames dies from the 2022-2023 Annual Catalog. I was pleased to see so many stand-alone die sets in the new catalog. I thought that the two dies in this set were so pretty and would make a nice addition to card fronts. When I first saw them in the catalog I pictured that a number of flower images in some of the stamp sets I own would fit into the center opening of the frames, but that didn’t turn out to be the case. When I received the dies it turns out that the openings were smaller than what they appeared to be in the catalog, so I was stumped as to how I would use them. Then it came to me that they would enhance the backgrounds on card fronts and that die cuts and images could be placed on top of the frames and voila! It worked like charm and I was so happy with the results of the two cards shown here.

These are two of the cards we made in one of my classes last month. The projects used the Potted Geraniums Bundle and the Hues of Happiness Suite. Here are instructions for how to make both cards. cards.

Hues of Happiness Card

  • Card base – cut piece of Melon Mambo cardstock at 5 1/2″ x 8 1/2″, score at 4 1/4″, fold and crease with a bone folder.
  • Cut a piece of Hues of Happiness Designer Series Paper with a variegated background at 4″ x 5 1/4″ and adhere to card front.
  • For the frame, cut a piece of Basic White cardstock at 3 1/2″ x 4 1/4″. Cut a piece of an adhesive sheet to the same size, adhere to back of cardstock and run through the Cut & Emboss machine. Remove adhesive backing and adhere to DSP.
  • Die cut a variety of flowers and leaves from the sheet of DSP with pink and yellow flowers that coordinate with the Blooming Happiness Dies. Arrange the collage over the frame and when you are pleased with the layout, start adhering the pieces to one another with Mini Glue Dots until you have one big floral piece. Adhere the floral piece to the card front with Stampin’ Dimensionals.
  • Stamp greeting from the Go To Greetings stamp set with Tuxedo Black Memento ink on scrap piece of Basic White cardstock and run through Cut and Emboss machine with the smallest label die from the Stylish Shapes dies. Adhere with Mini Stampin’ Dimensionals, tucking one edge under the flowers.

Potted Geraniums Card

  • Card base – cut a piece of Evening Evergreen cardstock at 4 1/4″ x 11″, score at 5 1/2″, fold and crease with a bone folder.
  • Cut a piece of Soft Succulent cardstock at 4 1/8″ x 5 3/8″ and adhere to card front.
  • Cut a piece of the Evening Evergreen paper from the Texture Chic Designer Series Paper at 4″ x 5 1/4″ and adhere to Soft Succulent piece.
  • For the frame, cut a piece of Basic White cardstock at 3 1/2″ x 4 1/4″. Cut a piece of an adhesive sheet to the same size, adhere to back of cardstock and run through the Cut & Emboss machine. Remove adhesive backing and adhere to DSP.
  • Die cut two leaf bases from scrap pieces of Soft Succulent cardstock. Die cut two detailed leaf overlay pieces from scrap pieces of Evening Evergreen. Before die cutting, back the Evening Evergreen pieces with an adhesive sheet for easy adhering to the leaf bases.
  • Die cut two flower bases from scrap pieces of Petal Pink cardstock. Die cut two detailed flower pieces from scrap pieces of Poppy Parade cardstock, backing the pieces with an adhesive sheet.
  • Arrange flowers and leaves over the Fancy Frame and once you are pleased with the layout, adhere with liquid glue.

Thanks for stopping by today!

Place an online order between $50 and $149 and use this host code for August. You will receive a free gift from me the following month.  If your order is $150 or more DO NOT use the host code. You will qualify for Stampin’ Rewards.

Ten new products from the annual catalog have been added as Sale-A-Bration freebies! When you place an online order that qualifies for Sale-A-Bration items, please be sure to use the item numbers listed in the flyer below in order to redeem them as SAB rewards, as they are different than the item numbers listed in the annual catalog!

This new Cozy & Bright Card Kit is now available for purchase. The kit has everything you need to make twelve 5 1/2″ x 4 1/4″ cards. It includes a photopolymer stamp set, acrylic block, adhesives, preprinted card bases, die cuts and stickers, Poppy Parade Stampin’ Spot, gold foil accents, preprinted envelopes, linen thread, as well as step-by-step instructions. Product colors: Cajun Craze, Early Espresso, Evening Evergreen, Garden Green, Poppy Parade, Pumpkin Pie. The cost of the kit is $23.00 and the item number is 160338. Click here to place your order in my online store. This kit is available only while supplies last.

Product List

Cozy & Bright Card Kit

Hello!

Stampin’ Up! has introduced this beautiful new Cozy & Bright Card Kit and it is now available for purchase.

The kit has everything you need to make twelve 5 1/2″ x 4 1/4″ cards. It includes a photopolymer stamp set, acrylic block, adhesives, preprinted card bases, die cuts and stickers, Poppy Parade Stampin’ Spot, gold foil accents, preprinted envelopes, linen thread, as well as step-by-step instructions. Product colors: Cajun Craze, Early Espresso, Evening Evergreen, Garden Green, Poppy Parade, Pumpkin Pie. The cost of the kit is $23.00 and the item number is 160338. Click here to place your order in my online store. This kit is available only while supplies last. I’m placing my order today!!

Watch this video as Sara Douglas, Stampin’ Up! CEO shows you how to put together the cards in the kit.

Sale-A-Bration is going strong and 10 new products from the annual catalog have been added as freebies! When you place an online order that qualifies for Sale-A-Bration items, please be sure to use the item numbers listed in the flyer below in order to redeem them as SAB rewards, as they are different than the item numbers listed in the annual catalog!

Earn these gifts with a $50 purchase:

  • Timber 3D Embossing Folder
  • Silver Foil 12″ x 12″ Specialty Pack
  • Gingham Embossing Folder
  • Seashells 3D Embossing Folder
  • Kraft Boxes
  • Brushed Metallic 12×12 Cardstock

Earn these gifts with a $100 purchase:

  • Flowers of Home Dies
  • Dots & Spots Die
  • Daffodil Dies
  • Aspen Tree Die

Thanks for stopping by today!