Butterfly Bouquet Blog Hop

Hello and welcome to the Butterfly Bouquet Blog Hop! I’m participating with a group of fabulous Stampin’ Up! Demonstrators from around the world that are showcasing projects made with products from the Butterfly Brilliance Collection. Please be sure to click on the names in the list at the end of this post to hop around and view the beautiful projects posted by these talented stampers.

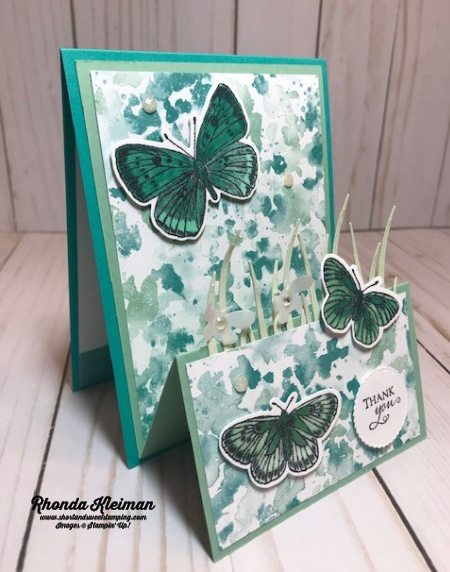
Here is how I made this fun Z-fold card.

  • Cut a piece of Bermuda Bay cardstock at 4 1/4″ x 11″ and fold in half, creasing sharply with a bone folder. For the Z-fold base, cut a piece of Mint Macaron cardstock at 4″ x 10 1/4″. Score at 2 1/2″ and 5″ and fold, creasing sharply. Adhere piece to the Bermuda Bay card base.
  • Cut piece of DSP from the Butterfly Bijou Designer Series Paper at 3 3/4″ x 5″ and adhere to larger section of the Mint Macaron base. Cut another piece of the paper at 2 1/4″ x 3 3/4″ for the front fold, but do not adhere this piece yet.
  • To stamp the butterfly images, it is easiest to use the Stamparatus because this is a very large stamp. Cut piece of Basic White cardstock at 5 1/4″ x 6 1/4″ and place on the base of the Stamparatus. Position the butterfly stamp and once it is adhered to the acrylic plate, ink up the entire image with Memento Tuxedo Black ink and stamp onto the cardstock. Cut out images with the coordinating Brilliant Wings die.
  • Color the butterflies with Bermuda Bay, Pool Party, Mint Macaron and Just Jade Stampin’ Blends. I used the three smaller butterflies and colored the larger of the three with the darker Blends. Don’t be afraid to mix all of these colors together. For some extra sparkle, brush with Wink of Stella.
  • Stamp the thank you greeting from the Very Versailles stamp set with the Memento ink and cut out with the small circle from the Tasteful Labels dies.
  • For the blades of grass, cut four large and four small grass pieces from Mint Macaron cardstock with the Dandy Wishes dies.
  • To put the card together, first adhere the largest butterfly to the larger front piece with Stampin’ Dimensionals. Next, arrange the grass along the top edge of the smaller front fold, alternating the heights of each piece. Adhere with multipurpose liquid glue for more flexible positioning. Adhere the smaller piece of DSP. When adhering the rest of the pieces, use Stampin’ Dimensionals on all of them. Adhere one of the butterflies at an angle, partially on the card front and partially on the grass, just using Stampin’ Dimensionals on the side of the wings that are on the flap. Adhere the last butterfly towards the bottom of the smaller card front. Adhere stamped greeting.
  • To embellish the card, add a few Elegant Faceted Gems. I also cut out two small vellum butterflies from the Brilliant Wing dies, curled the wings and adhered them to the grass with Mini Glue Dots. Add an Elegant Faceted Gem to each.

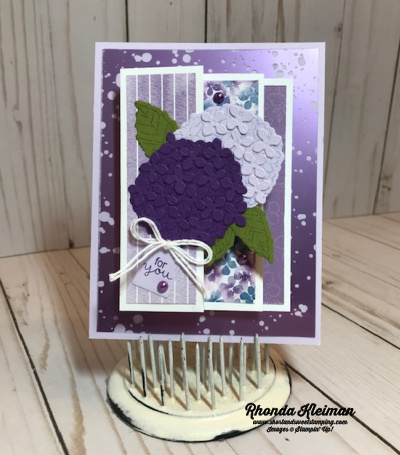
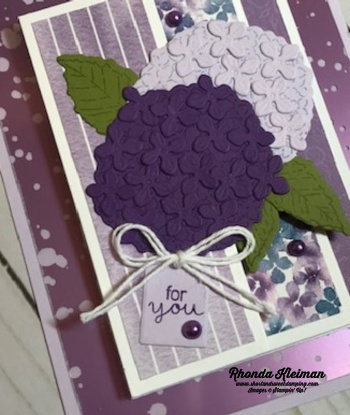
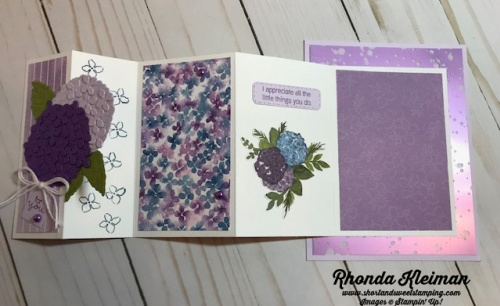
This special collection is only available until May 3rd, and I’m sad to say that the Designer Series Paper has proven to be so popular that is has sold out and is no longer available. The Natural Touch Specialty Paper is still available and the stamp set and dies will carry over to the new 2021-2022 Annual Catalog.

Thanks for stopping by today!

Product List
Stamparatus
[146276]
$49.00

Annual Catalog Retiring Product List

Hello!

The Stampin’ Up! 2020-2021 Annual Catalog retiring product list is now available. The list includes stamp sets and bundles, inks, cardstock, Designer Series Paper, punches, dies and embellishments, with selected items on sale at up to 75% off.

Click here to view the retiring products list

Some things to keep in mind when viewing the list:

  • Product availability is while supplies last
  • Bundles include some products that are not retiring so be sure to check the list to see which individual products are retiring
  • A number of bundles are marked as retiring however they will continue to be sold as individual items beginning on May 4th and no longer available at the 10% discount
  • The retiring 2019-2021 In Colors are selling out fast so you might want to purchase reinkers for your ink pads or stock up on cardstock and other coordinating products such as DSP or embellishments

Click here to view last chance and sale items online

If your order is $50 up to $149 please use this host code to receive a free gift from me. If your order is $150 or more, DO NOT use the code. You will earn Stampin’ Rewards!

Thanks for stopping by today!

Free Shipping One Day Only

Happy St. Patrick’s Day!

Beginning at 12:00am and ending at 11:59pm Mountain Time on March 17th, enjoy free shipping on orders of $50 or more! Need more adhesives, Basic White cardstock, or envelopes? Take advantage of this opportunity to stock up on basic crafting supplies or In Color retiring products.

Don’t forget to use my March Host Code!

Thanks for stopping by today!

Retiring 2019-2021 In Colors

The new 2021-2022 annual catalog will be released one month earlier than usual on May 4th, which means that the 2019-2021 In Colors will be retiring on May 3rd.  If you would like to purchase cardstock, inks, markers, etc. now is the time!  Many of the products are already at low inventory and I don’t know if supplies will be replenished.  Click on any of the pictures if you’d like to purchase any of these In Color products from my online store.  I’m very sorry to see this group of colors go.  This was one of my most favorite groups of In Colors in all the years I’ve been a demonstrator!

Product List

Thanks for stopping by today!

Hydrangea Hill-Kylie’s International Blog Highlights

Today I’m participating in Kylie Bertucci’s International Blog Highlights. Readers get to vote on their top five favorites in the gallery and the top 10 winners will get to participate in an International Blog Hop later this month. The theme is “thank you” and is a way for us to show our appreciation to someone that has inspired, helped or supported us in some way. Today’s card is a fun fold that features the beautiful Hydrangea Hill Suite.

Here is how I made the card.

  • Card base – cut a piece of Purple Posy cardstock at 4 1/4″ x 5 1/2″.
  • Cut piece of Highland Heather Mercury Glass Designer Acetate at 4″x 5 1/4″ and adhere with Stampin’ Seal+ to card base.
  • Cut piece of Basic White cardstock at 4 1/4″ x 11″, score at 1 1/2″, 3″, 5 1/2″, 8″, fold and crease sharply with a bone folder.
  • Cut three coordinating pieces of Hydrangea Hill Designer Series Paper at 1 1/4″ x 4″, 2 1/4″ x 4″, 2 3/4″ x 4″and adhere to folds.
  • Stamp two of the flower tops of the hydrangea. Stamp one with Gorgeous Grape ink on a piece of Gorgeous Grape cardstock and the other with Seaside Spray ink on a piece of Purple Posy cardstock. Stamp the leaf part of the flower with Old Olive ink on piece of Old Olive cardstock. Die cut with the coordinating Hydrangea dies. Trim away the stems. Die cut one set of flower petals with Purple Posy cardstock and two sets with Gorgeous Grape cardstock.
  • Adhere the flower petals on the two flowers. Arrange them around the flowers before adhering and then do one at a time with a tiny dot of liquid glue in the center of each petal so that you have some wiggle room to move them around to adjust how they fit. I found it very helpful to use a tweezer to hold the petals while applying the glue and then flipping to the other side to adhere.
  • Adhere the two flowers together and then adhere the leaves.
  • Stamp “For You” greeting for front of card with Gorgeous Grape ink on scrap piece of Purple Posy cardstock and cut with the tag die.
  • Cut two lengths of white bakers twine and tie in a bow.
  • Adhere the flower to the card front, making sure to only glue the left half of the piece onto the front flap so that the card can open. Adhere the tag under the bottom of the Gorgeous Grape flower. Adhere the bow with a mini glue dot.
  • For the inside of the fun folds, on the first panel, stamp the small open petal randomly with Misty Moonlight ink.
  • Stamp greeting for inside of card with Gorgeous Grape ink on scrap piece of Purple Posy cardstock. Cut with the label die from the Hydrangea Dies set. Adhere to top of the larger panel.
  • Fussy cut one of the floral clusters from the DSP and adhere under the greeting.
  • To finish off the card, add one of the Gorgeous Grape Pastel Pearls to the tag and two more around the card front.

I’d be so appreciative if you would vote for my card! Click on the vote image below. Once you are in the gallery, click on the heart at the top right hand side of the picture as the hearts appear.

Thanks so much for stopping by today!

Product List
Paper Snips
[103579]
$10.00

Handsomely Suited Polo Shirt Cards

Hello! I needed a few masculine birthday cards so I turned to the Well Suited Suite in the mini catalog. I saw a few cute cards made by Tina Zinck and Michelle Strazds on Pinterest that were made to look like polo shirts and CASEd them, making a few changes. I did one in Night of Navy and the other in Smoky Slate. They were a lot of fun and very easy to put together!

Here is how I made the cards.

  • Card base – cut piece of Night of Navy or Smoky Slate cardstock at 5 1/2″ x 8 1/2″, score at 4 1/4″, fold and crease with a bone folder.
  • Cut piece of Well Suited Designer Series Paper at 4″ x 5 1/4″. Cut a “V” in the center. I used the collar die from the Suit and Ties Dies and made the “V” by centering the die at the 2″ mark, slightly below the top of the DSP, traced with a pencil and cut out with Paper Snips.
  • Die cut collar and long strip with either Night of Navy or Basic Gray cardstock. The long strip will be used for the button placket. Trim the strip to 2″ and adhere to DSP below the center of the “V.” Adhere collar piece.
  • Die cut pocket from DSP and die cut the contrasting trip with the small strip die. Adhere to top of pocket. Adhere to DSP base.
  • Die cut Basic White buttons with the button die. There are six buttons on the one die so I used three for each card. Adhere them to the placket. I used the putty tip on the Take Your Pick tool to pick up each button, place them on Mini Glue Dots, and then onto the placket.
  • For the Night of Navy card stamp the birthday greeting from the Handsomely Suited stamp set with Night of Navy ink on scrap piece of Basic White cardstock and punch out with the Tailored Tag punch. Adhere to DSP base. Adhere DSP piece to Night of Navy card base.
  • For the Smoky Slate card stamp the birthday greeting with Basic Gray ink. Punch out with the Tailored Tag Punch. Punch another tag with a scrap piece of Basic Gray cardstock. Cut in half horizontally. Adhere one piece to top of tag and the other piece to the bottom of the tag so that it frames the Basic White tag. Adhere to DSP base and adhere entire piece to Smoky Slate card base.
  • Cut a piece of Basic White cardstock at 4″ x 5 1/4″. Leave blank or stamp a greeting and adhere to inside of card.

Thanks for stopping by today!

Product List
Paper Snips
[103579]
$10.00

Butterfly Bouquet Now Available!

Butterfly Bouquet, an early release from the 2021 Annual Catalog is now available! Beginning today and running through May 3rd you can purchase the Butterfly Brilliance Bundle, Butterfly Brilliance Collection or individual products. When you purchase the bundle or collection you will receive a 10% discount. The collection includes Butterfly Bijou DSP and Natural Touch Specialty Paper, exclusive to the collection and only available during this promotion. The 10% discount on the Butterfly Brilliance Bundle will be continued in the new catalog.

Here are close-up pictures of the Butterfly Bijoux Designer Series Paper and the Natural Touch Specialty Paper.

Watch this video to see how to make two quick projects.

Here are a few samples created by Stampin’ Up! design artists.

Here’s To You is the March Paper Pumpkin kit. It consists of eight 4 1/4″ x 5 1/2″ cards, 2 each of 4 designs and coordinating envelopes. Coordinating colors are Bumblebee, Calypso Coral, Old Olive, Petal Pink, Pretty Peacock, Seaside Spray. Four stencils and a stamping sponge are included and everything comes in a cute and collectible box. Order now through March 10 at my Paper Pumpkin website. The kit will arrive in your mailbox by the 20th of the month. Check out this quick video.

Thanks for stopping by today!

Product List