Shaded Summer Thank You-Kylie’s Training Blog Hop

Hello! Welcome to Kylie Bertucci’s Demonstrator Training Blog Hop for September. This is the last hop for the 2020-2021 year. I’m part of a group of Stampin’ Up! demonstrators from around the world that participate in Kylie’s program for building our businesses. The theme for this year is thank you cards that we make as a way to show appreciation to our customers and teams. Please be sure to click on the names in the list at the end of this post to hop around and view the beautiful projects created by so many talented stampers.
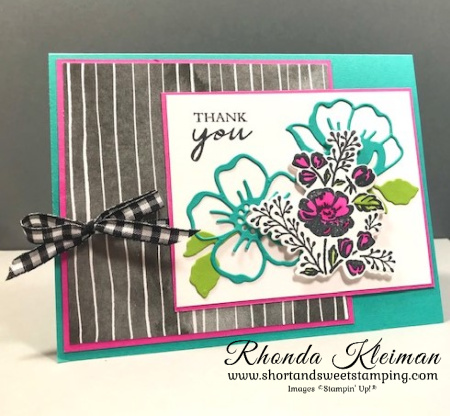
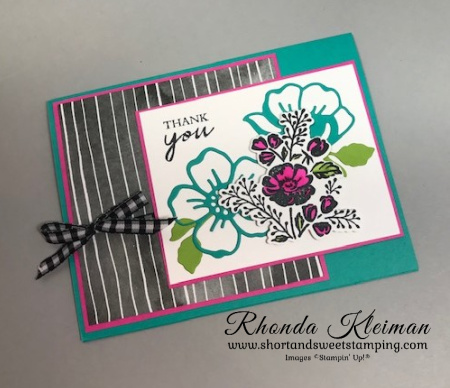
Today’s card features the Shaded Summer Stamp set in the annual catalog, along with the Summer Shadows Dies that you can earn for free with a $100 purchase during Sale-a-Bration through the end of September. The Beautifully Penned Designer Series Paper is also a Sale-a-Bration item that you can earn with a $50 purchase. I decided to go with bright colors and used Magenta Madness as one of them. As I was going through all of my cardstock recently to see what needed to be replenished, I saw that I barely made a dent with this one. As much as I love bright colors, this is way bright even for me!

Here is how I made the card.

  • Card base – cut a piece of Bermuda Bay cardstock at 5 1/2″ x 8 1/2″, score at 4 1/4″, fold and crease with a bone folder.
  • Cut two pieces of Magenta Madness cardstock, one at 4″ x4″ and one at 3 1/8″ x 3 7/8″.
  • Cut piece of Beautifully Penned DSP at 3 7/8″ x 3 7/8″ and adhere to the 4″ square piece of Magenta Madness cardstock. Tie a bow around this piece with the black & white gingham ribbon. Adhere piece to card base.
  • Cut a piece of Basic White cardstock at 3″ x 3 3/4″. Stamp thank you from the Shaded Summer stamp set with Tuxedo Black Memento ink in upper left corner.
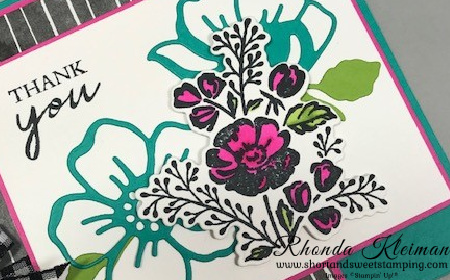
  • Stamp the small floral image from the stamp set with the Memento ink onto a piece of Basic White cardstock. Color the flowers with the light and dark Magenta Madness Stampin’ Blends. Color the leaves with the light and dark Granny Apple Green Stampin’ Blends. Run through die cutting machine with the coordinating die from the Summer Shadows dies.
  • Back two scrap pieces of Bermuda Bay cardstock with an adhesive sheet cut to size. Run two different flowers through die cutting machine. Die cut two of the small solid leaves from scrap pieces of Granny Apple Green cardstock. Pull adhesive sheet backings off the flowers and adhere the leaf stems to the backs of each. Apply a few small dots of liquid glue to the leaves and adhere the flowers to the greeting piece.
  • Adhere the floral image over the die cut flowers with Stampin’ Dimensionals. Adhere piece to te 3 1/8″ x 3 7/8″ piece of Magenta Madness cardstock. Adhere piece to card front, overlapping the square piece.
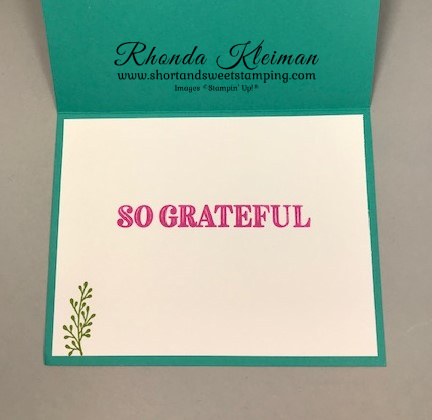
  • For the inside of the card, cut a piece of Basic White cardstock at 4″ x 5 1/4″. Stamp the “so grateful” greeting from the Ornate Thanks stamp set with Magenta Madness ink. Stamp the sprig from the Shaded Summer stamp set with Granny Apple Green ink in lower left corner. Adhere to card.
Thanks for stopping by today!

Join Stampin’ Up! now through September 30th. You get to select $125 worth of products for only $99 and will also get a FREE bundle from the Holiday Catalog! Everything ships for free. I’d love to have you join my team. Become a happy discount shopper or build a business – the choice is yours! Click here for the benefits of joining Stampin’ Up!

Here is a list of bundles you can select from.

Place an online order between $50 and $149 and use this host code for September. You will receive a free gift from me the following month.  If your order is $150 or more DO NOT use the host code. You will qualify for Stampin’ Rewards.

Product List
Paper Snips
[103579]
$10.00

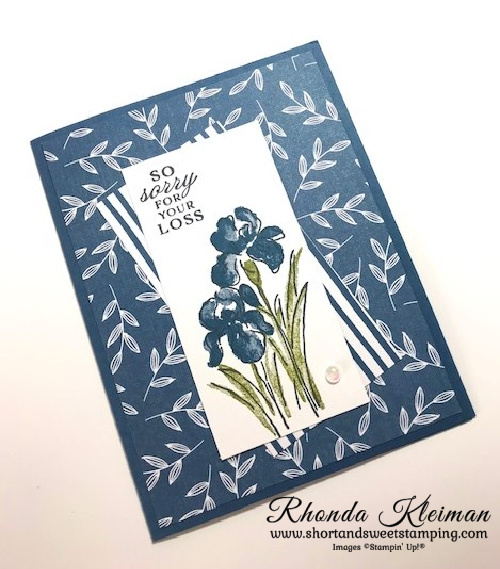
Inspiring Iris Sympathy Card

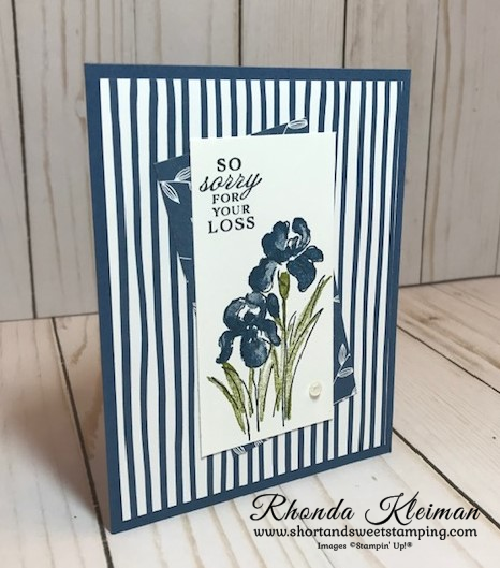
Hello! Today’s card features the Inspiring Iris stamp set, which will be retiring on May 3rd. I needed to make a few sympathy cards last month and turned to this set, which I must confess, I haven’t used too often. It has lovely images and sentiments. I used the Dandy Garden Designer Series Papers because I thought the designs in the Misty Moonlight color would work well for male recipients of some of the cards.

Here is how I made the card.

  • Card base – cut a piece of Misty Moonlight cardstock at 5 1/2″ x 8 1/2″, score at 4 1/4″, fold and crease with a bone folder.
  • Cut piece of the Dandy Gardens DSP at 4″ x 5 1/4″ and adhere to card front. Cut a coordinating piece of DSP at 3″x 4 1/2″.
  • Cut piece of Basic White cardstock at 2 3/4″ x 4 1/4.” This is a two-step stamp so first stamp the outline image with Memento Tuxedo Black ink. Stamp the fill-in image for the flower petals with Misty Moonlight ink. Stamp the fill-in image for the leaves with Old Olive ink.
  • Stamp greeting with Misty Moonlight ink in upper left corner. I used one of the greetings from the Prized Peony stamp set.
  • Adhere the coordinating piece of DSP to the card front, placing it at an angle. Adhere the stamped piece, centering it over the DSP. Adhere a large Opel Round at the bottom right of the stamped image.
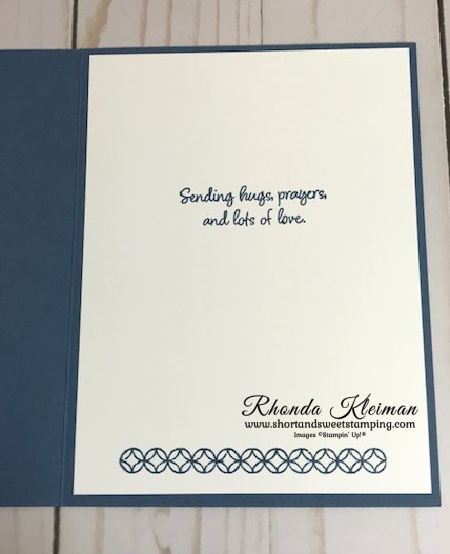
  • For the inside of the card, cut a piece of Basic White cardstock at 4″ x 5 1/4″. Stamp the greeting from the Inspiring Iris stamp set with Misty Moonlight ink. Stamp the geometric image, centering it at the bottom of the piece. Adhere to card.

This is another version of the card I made using the same two pieces of DSP but, switching them up in the layout.

Thanks for stopping by today!

If you love baseball, the May Paper Pumpkin kit is for you, with its fun baseball themes! The kit includes everything you need to make nine cards, 3 each of 3 different designs, plus coordinating envelopes. Coordinating colors are Basic White, Bumblebee, Night of Navy, Pacific Point, Real Red, Smoky Slate, Soft Suede. Comes with the official bubble gum of the MLB—a ballpark favorite! Visit my Paper Pumpkin website to subscribe.

There are less than two weeks remaining before the 2020-2021 Annual Catalog retires on May 3rd. While some products are now sold out, there are still many remaining products available at up to 75% off, while supplies last. Click here to shop for last-chance products in my online store.

Please use this April Host Code when you shop in my online store if your order is between $50 and $149.00 and you will receive a free gift from me. If your order is $150 or more, DO NOT use this code, as you will be entitled to Stampin’ Rewards. You will still get the free gift from me.

Product List
Clearance Rack Refresh

New items have been added to the Clearance Rack in the online store. Supplies are limited! Some items are reduced by up to 60% and discounted products tend to sell out quickly!

Click here to go to the Clearance Rack page in my online store.

Click here to see the list of retiring products from the 2020-2021 Annual Catalog, some at prices discounted at up to 75%. Availability is while supplies last!

The following sets of dies are discounted by 75%! I’ve also listed the name, item number and price for the coordinating stamp sets.

World Map Dies Item # 152712 $31.00

Sale Price – $7.75

Coordinates with the Beautiful World stamp set Item #152994 $23.00

Flowering Dies Item #152727 $31.00

Sale Price – $7.75

Coordinates with the Flowering Blooms stamp set Item #152375 $21.00

Budding Blooms Dies Item #149548 $33.00

Sale price – $8.25

Coordinates with the Bloom & Grow stamp set Item #149229 $26.00

Lasting Elegance Dies Item #151475 $34.00

Sale Price – $8.50

Coordinates with the Last a Lifetime stamp set Item #151479 $23.00

Magnolia Memory Dies Item #149578 $35.00

Sale Price – $8.75

Coordinates with the Good Morning Magnolia stamp set Item #149298 $36.00

Special Days Dies Item #153587 $35.00

Sale Price – $8.75

Coordinates with the Special Someone stamp set Item #151643 $17.00

Wild Roses Dies Item #149547 $34.00

Sale Price – $8.50

Coordinates with the To a Wild Rose stamp set Item# 149452 $26.00

Sale Price-$23.40

Trio of Tags Item #150667 $16.00

Sale Price – $4.00

Coordinates with Celebration of Tags stamp set Item #153307 $21.00

Coordinates with Tags, Tags, Tags stamp set Item #150508 $21.00

Thanks for stopping by today!

Please use this April Host Code when you shop in my online store if your order is between $50 and $149.00 and you will receive a free gift from me. If your order is $150 or more, DO NOT use this code, as you will be entitled to Stampin’ Rewards. You will still get the free gift from me.

Annual Catalog Retiring Product List
Hello!

The Stampin’ Up! 2020-2021 Annual Catalog retiring product list is now available. The list includes stamp sets and bundles, inks, cardstock, Designer Series Paper, punches, dies and embellishments, with selected items on sale at up to 75% off.

Click here to view the retiring products list

Some things to keep in mind when viewing the list:

  • Product availability is while supplies last
  • Bundles include some products that are not retiring so be sure to check the list to see which individual products are retiring
  • A number of bundles are marked as retiring however they will continue to be sold as individual items beginning on May 4th and no longer available at the 10% discount
  • The retiring 2019-2021 In Colors are selling out fast so you might want to purchase reinkers for your ink pads or stock up on cardstock and other coordinating products such as DSP or embellishments

Click here to view last chance and sale items online

If your order is $50 up to $149 please use this host code to receive a free gift from me. If your order is $150 or more, DO NOT use the code. You will earn Stampin’ Rewards!

Thanks for stopping by today!

Lovely You Meets Paper Blooms

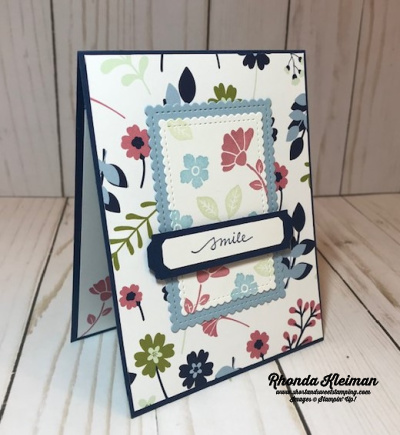
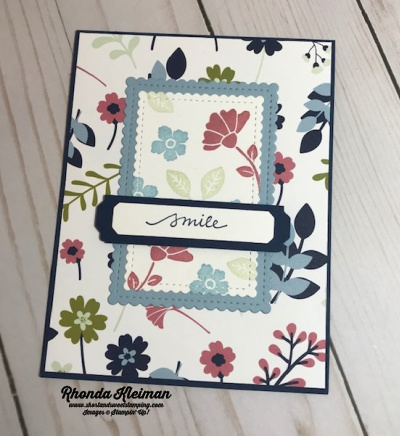
Hello! Today’s card features the pretty Paper Blooms Designer Series Paper, one of the Stampin’ Up! free Sale-A-Bration items you can earn with a $50 purchase. When I first saw this paper, I immediately thought that it would work beautifully with the Lovely You stamp set, so I’ve paired up these two products.

The card layout is from Sunday Stamps Challenge. I haven’t participated in a challenge for a long time and when I came across this sketch I thought it would be a fun one to do so decided to give it a go! Here is the sketch for SSC248.

Here is how I made the card.

  • Card base – Night of Navy cardstock cut at 4 1/4″ x 11″. Score at 5 1/2″, fold and crease with a bone folder.
  • Cut piece of Paper Blooms DSP at 4 1/8″ x 5 3/8″ and adhere to card front.
  • Cut piece of Seaside Spray cardstock at 2 3/4″ x 3 3/4″ and run through die cutting machine with the second largest rectangle from the Stitched so Sweetly dies.
  • Cut piece of Basic White cardstock at 2 1/2″ x 3 1/2″ and run through die cutting machine with third largest rectangle from the Stitched so Sweetly dies. Randomly stamp flowers and leaves from Lovely You stamp set with Rococo Rose, Seaside Spray and Soft Sea Foam inks. Adhere to Seaside Spray rectangle. Adhere piece to center of card front.
  • Cut scrap piece of Basic White cardstock at 1/2″ x 2 3/4″, stamp greeting with Night of Navy ink and punch both ends with the Lovely Labels Pick a Punch. Cut scrap piece of Night of Navy cardstock at 3/4″ x 3 1/4″ and punch both ends. Adhere labels together. Adhere to stamped piece with Stampin’ Dimensionals.
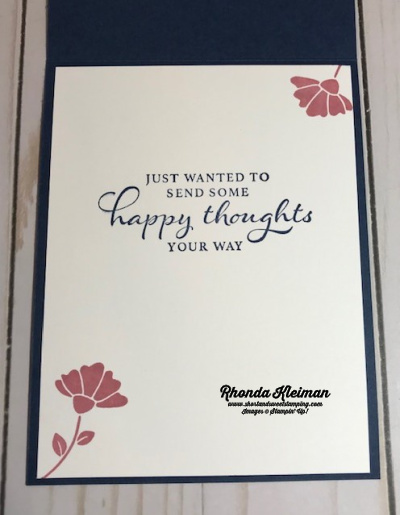
  • Cut piece of Basic White cardstock at 4″ x 5 1//4″. Stamp flower with Rococo Rose ink. Stamp greeting from Happy Thoughts stamp set with Night of Navy ink. Adhere to inside of card.

Thanks for stopping by today!

Product List

Daisy Lane- Kylie’s International Blog Highlights

Hello and Happy New Year! I hope that 2021 will be brighter for everyone. Today I’m participating in Kylie Bertucci’s International Blog Highlights. Readers get to vote on their top five favorites in the gallery and the top 10 winners will get to participate in an International Blog Hop later this month. The theme is “thank you” and is a way for us to show our appreciation to someone that has inspired, helped or supported us in some way.

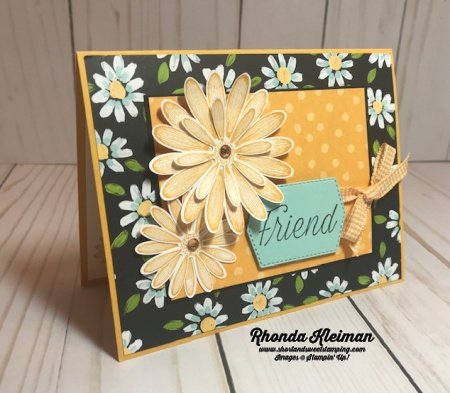
This card uses the Flowers and Field Designer Series Paper, one of the free products you will be able to earn with a $50 purchase during Sale-A-Bration, which begins tomorrow, January 5th. I paired it with the Daisy Lane stamp set and coordinating daisy punches. The second I laid eyes on this paper in the SAB brochure it immediately brought me back to the first dress I made in my Junior High School sewing class back in the mid-1960’s! I grew up in Brooklyn, New York so my mother and I took the subway to 34th Street in Manhattan to go to Macy’s department store. At the time they had an entire floor devoted to sewing and fabrics, now long gone. After perusing thousands of bolts of fabrics, many which had flowers on black backgrounds, I selected one with a daisy print. The dress was a simple shift with a tie belt, which was very in-style at the time. I saved the dress and went up to my attic this weekend to take a few pictures. The yellow in the fabric is an exact match to the Bumblebee In Color. Everything old is new again!

Here is how I made the card.

  • Card base – Cut a piece of Bumblebee cardstock at 5 1/2″ x 8 1/2″, score at 4 1/4″, fold and crease with a bone folder.
  • Cut piece of daisy print from the Flower & Field DSP at 4 1/8″ x 5 3/8″ and adhere to card front.
  • Cut piece of Basic Black cardstock at 3″ x 4″. Cut piece of Bumblebee polka dot print DSP at 2 7/8″ x 3 7/8″ and adhere to cardstock.
  • Stamp the daisy images from the Daisy Lane stamp set. On scrap piece of Whisper White cardstock, use Bumblebee ink to stamp the large daisy image twice and stamp the small daisy image three times. Punch out with the large and medium daisy punches. For the large flower, adhere two of the large daisies together and then adhere one small daisy. For the small flower adhere the two remaining small daisies together. Adhere with either glue dots or a small amount of liquid glue on the flower centers. Curl the tips of the large daisy with a bone folder. Add a champagne rhinestone to the center of each flower.
  • Stamp the greeting with Memento Tuxedo Black ink on scrap piece of Pool Party cardstock. Cut out with one of the dies from the Tasteful Labels die set. This is one of my “go to” sets for cutting out greetings.
  • Cut an 18″ piece of Bumblebee gingham ribbon and tie into a bow around the polka dot piece. Adhere piece to center of card front. Adhere large daisy with Stampin’ Dimensionals in upper left corner and adhere smaller daisy under the larger flower. Adhere greeting with Stampin’ Dimensionals.

I’d be so appreciative if you would vote for my card! Click on the vote image below. Once you are in the gallery, click on the heart at the top right hand side of the picture as the hearts appear.

Thanks for stopping by today!

This is the last day you will be able to place orders for items in the August-December 2020 Mini Catalog. The new January-June Mini Catalog goes live tomorrow!

 Product List  
Daisy Punch
[143713]
$18.00
Paper Snips
[103579]
$10.00

10% Off Sale Extended Through November 25th

Due to technical challenges customers encountered yesterday morning, Stampin’ Up! has extended the Online Extravaganza sale through November 25th, 11:59MT. Take advantage of this extra 24 hours to save on over 600 products from the Annual Catalog. Now is a great time to stock up on cardstock, fill in your collection of ink pads, adhesives, ribbons and more. If you have any bundles on your wish list, you will get an additional 10% off the already discounted bundle price. If you have friends and relatives that enjoy crafting, our kits make wonderful holiday gifts. Check them out on pages 6-9 in the catalog.

Please note that there are some exclusions. Items from the August-December 2020 Mini Catalog (Holiday Catalog) as well as the products listed below are not included.

Thanks for stopping by today!