Celebrate the Miracle

Hello!

I’m back again after another long break. Wishing my Jewish friends and customers a very belated Happy Chanukah! I’ve been busy making cards for the last two months but haven’t had time to do any blogging. I recently finished a major renovation project in my living room and dining room which affected my annual holiday card workshops due to the chaos going on around me. I usually begin my workshops in early November but had to push them back a few weeks. My last workshop was yesterday and now I can finally start getting back into more normal routines. I will be blogging my holiday cards for the next two weeks.

Here are photos of my living room and dining room. My home is over 100 years old and the downstairs floors, steps going upstairs and upstairs hallway were covered with old white carpet that was here when I bought the home 18 years ago. I had the carpet removed and wood floors were refinished to their original state. Paint job, all new furniture in both rooms and new light fixtures. I can’t believe it is my house! I’m looking forward to the fun part, shopping around for accessories, after the new year!

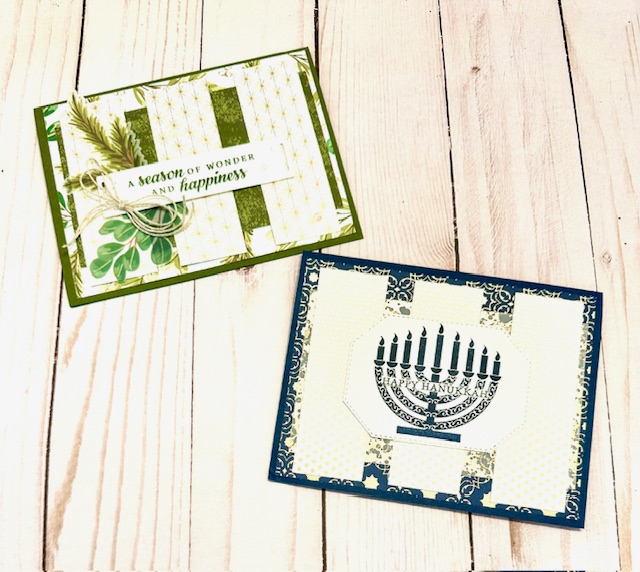
I held one Chanukah card workshop using the beautiful new and very long-awaited Stampin’ Up! stamp set, Celebrate the Miracle, and even managed to get my cards mailed out on time. I did three different cards. No instructions for how I made the card, however I have listed the cutting measurements for each. Supplies used are at the end of this post.

Cutting measurements

  • Night of Navy cardstock – cut one piece at 5 1/2″ x 6 1/2″ and score at 2 1/4″; cut one piece at 4 1/4″ x 6″ and score at 3″.
  • Very Vanilla cardstock- cut one piece at 3″ x 4″ and one piece at 2 3/4″ x 4 1/4″
  • Shining Brightly DSP- cut two pieces at 2″ x 5 1/4″

Cutting measurements

  • Night of Navy cardstock – cut one piece at 5 1/2″ x 8 1/2″ and score at 4 1/4″; cut one piece at 3 3/4″ x 4 1/4″; cut one piece at 2 5/8″ x 3 3/8″
  • Very Vanilla cardstock – cut one piece at 4″ x 5 1/4″; cut one piece at 2 1/2″ x 3 1/4″
  • Shining Brightly DSP – Cut one piece at 4″ x 5 1/4″; cut one piece at 3 1/2″ x 4″

Cutting Measurements

  • Cut one piece of Pebbled Path cardstock at 4 1/4″ x 11″and score at 4 1/4″ and 5 1/2″
  • Cut one piece of Basic White cardstock at 4″ x 4″ and 4 pieces at 1 1/2″ x 1 1/2″
  • Cut four pieces of Boho Blue cardstock at 1 5/8″
  • Cut one piece of Pebbled Path Tartan Foil Specialty DSP at 4″ x 4″ and one piece at 1″ x 4″

Thanks for stopping by today!

Click here to view the Last Chance list

Click here to view the Carryover list
Place an online order between $50 and $149 and use this host code for December. You will receive a free gift from me the following month.  If your order is $150 or more DO NOT use the host code. You will qualify for Stampin’ Rewards.

Product List
Paper Snips
[103579]
$11.00

Happy Chanukah Cards

Hello!

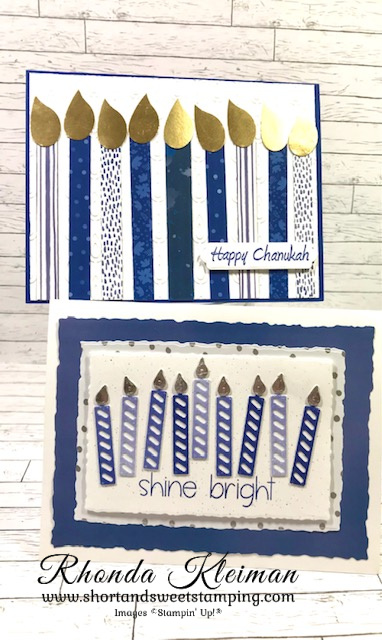
Today is the seventh and next-to-last day of Chanukah. Here are two of the cards I designed to send to family and friends. Since Stampin’ Up! hasn’t had a Chanukah stamp set in many years I have had to purchase stamp sets from other companies. This year I purchased a new stamp set and coordinating dies from Honey Bee. I use Stampin’ Up products such as cardstock, Designer Series Paper and Specialty Papers, ink and embellishments. I also use retired products that I’ve kept, knowing that they work well with my limited blue, silver and gold color palette. This year I used Starry Sky, one of the 2022-2024 In Colors in several of the cards. It is such a bright and pretty blue and it worked beautifully. I also used greetings from the Brightest Glow stamp set in the July-December 2022 Mini Catalog. I loved that many of the greetings, while intended for Christmas cards, would be perfect for my cards because Chanukah is also known as the Festival of Lights and some of the greetings include the word “light.”
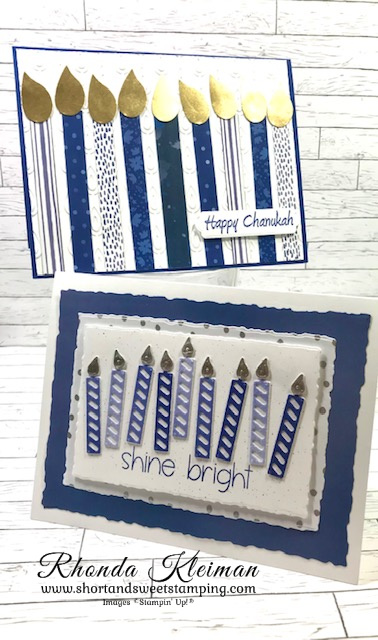
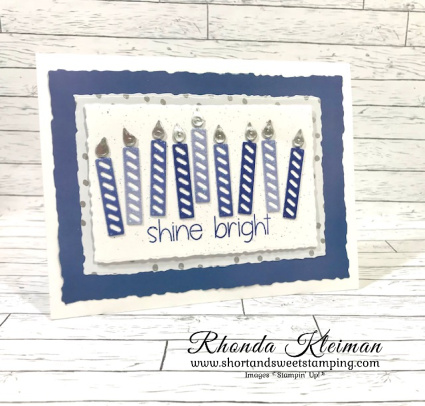
Here is how I made this card.
  • Card base – cut a piece of Basic White Thick cardstock at 5 1/2″ x 8 1/2″, score at 4 1/4″, fold and crease with a bone folder.
  • Cut a piece of the variegated paper from the Sun Prints Designer Series Paper at 4″ x 5 1/4″ and run through a die cutting machine with the largest Deckled Edge Rectangle die. Adhere to card base.
  • Cut a piece of the silver dot paper from the Silver & Gold Specialty Paper at 3″ x 4 1/4″ and run through die cutting machine with the third largest Deckled Edge Rectangle Die and adhere to card front. This DSP was a free Sale-A-Bration item earlier this year.
  • Cut a piece of Basic White cardstock at 2 3/4″ x 4 1/4″ and run through die cutting machine with the fourth largest Deckled Edge Rectangle Die. Flick Wink of Stella and Night of Navy and Starry Sky ink onto piece with Stampin’ Blends.
  • To make the candles, cut 1/2″ strips of the Starry Sky paper from the 2022-2024 In Color 6″x6″ Glimmer Paper and back with 1/2″ pieces of an adhesive sheet. For the flames, cut a scrap piece of Silver Foil Paper and back with an adhesive sheet. Use scrap pieces of Basic White cardstock for the candle backing pieces. Use the candle and flame dies from the Sentiment Silhouettes Dies. Die cut nine candles and nine backing pieces. Adhere together. Cut nine flames. Arrange candles on the Basic White Deckled Edge Rectangle piece and adhere with liquid glue. Adhere candle flames.
  • Stamp greeting with Starry Sky ink at bottom of the piece. The greeting I used is from the Honey Bee stamp set. Adhere to card front with Stampin’ Dimensionals.
  • Stamp greeting with Starry Sky ink on inside of card.

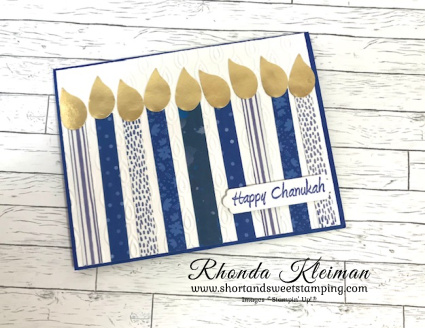
Here is how I made this card. I got the idea from Pinterest and apologize for not remembering who it came from. I had thought of using DSP strips for the candles and this design shows off the DSP very nicely.
  • Card base – cut a piece of Starry Sky cardstock at 5 1/2″ x 8 1/2″, score at 4 1/4″, fold and crease with a bone folder.
  • Cut a piece of Basic White cardstock at 4 1/8″ x 5 3/8″. Run through embossing machine with the Peacock Embossing Folder (retired) and adhere to card front. I love this folder and it looks like flames!
  • Cut eight strips of Designer Series Paper at 3/8″ x 3″ and one strip at 1/2″ x 3″. I used paper from the Sun Prints DSP and the 2022-2024 In Color 6″x6″ DSP. Arrange the strips on the card front, placing the 1/2″ strip in the middle. Adhere with liquid glue.
  • Make the flames by using any bird punch that has a separate wing. I used a retired punch to do this. Use a scrap piece of Gold Foil paper and punch nine pieces. Adhere with either liquid glue or a glue dot.
  • Stamp greeting with Starry Sky ink on scrap piece of Basic White cardstock. Run through die cutting machine with the smallest label die from the Seasonal Labels die set. Adhere over candles with Stampin’ Dimensionals.
  • Cut a piece of Basic White cardstock at 4″ x 5 1/4″ and stamp a greeting from the Brightest Glow stamp set with Starry Sky ink. Adhere to inside of card.

Thanks for stopping by today!

Place an online order between $50 and $149 and use this host code for December. You will receive a free gift from me the following month.  If your order is $150 or more DO NOT use the host code. You will qualify for Stampin’ Rewards.

Product List

Apple Harvest Rosh Hashanah Card

Hello!

My card today features the Apple Harvest stamp set from the July-December 2022 Mini Catalog and the Apple Blossoms Dies, one of several sets in the Perfect Partners promotion that ends today. The minute I laid eyes on this stamp set in the catalog I knew I had to have it because it would be perfect for making cards for Rosh Hashanah, the Jewish New Year, that I celebrated earlier this week. Stampin’ Up! hasn’t had any stamps specifically for Jewish holidays in many years, so each year I eagerly await the annual and holiday mini catalogs to see if there are any stamp sets that I can adapt. For the last few years there have been sets that include stamps with pomegranates, grapes and doves that are all images used in cards for this holiday. I lucked out again this year with the apples!
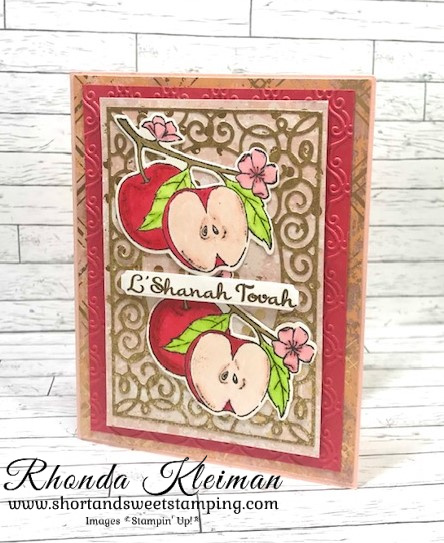
Here is how I made the card.
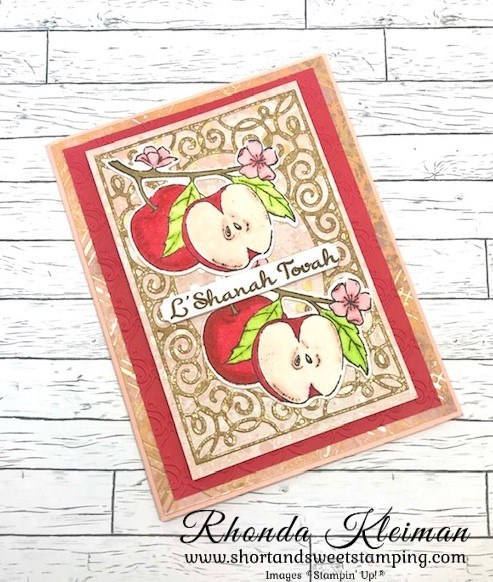
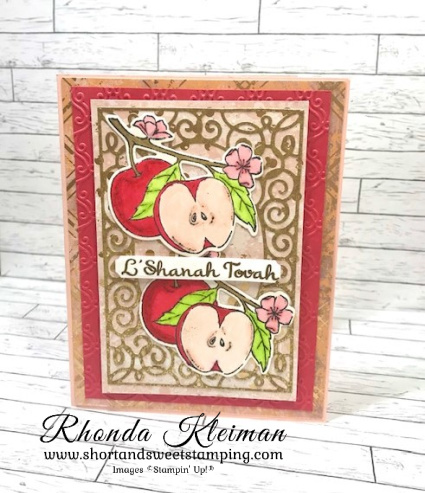
  • Card base – Cut a piece of Petal Pink cardstock at 5 1/2″ x 8 1/2″, score at 4 1/4″, fold and crease with a bone folder.
  • Cut a piece of one of the Petal Pink sheets in the Texture Chic Specialty Designer Series Paper pack at 4 1/8″ x 5 3/8″ and adhere to card front.
  • Cut a piece of Sweet Sorbet cardstock at 3 3/4″ x 5 1/8″ and run through a die cutting & embossing machine with the Stylish Scroll Embossing Folder. Adhere to card front. Please note that this embossing folder is retired. I love how the folder echos the scrolls in the Fancy Frame die, which is why I chose to use it.
  • Cut a piece of the Petal Pink and gold dot sheet of DSP at 3 1/8″ x 4 3/4″. Cut a piece of Distressed Gold Specialty Paper at 3 1/2″ x 5″. Cut a piece of adhesive sheet the same size and adhere to the paper. Run through a die cutting and embossing machine with the scroll die from the Fancy Frames Dies. Remove adhesive sheet backing and adhere to the Petal Pink DSP.
  • Cut two pieces of Shimmery White cardstock at 3″ square and stamp apple image from the Apple Harvest stamp set with Memento Ink on both pieces.
  • Color the blossoms with Flirty Flamingo Stampin’ Blends. Color the leaves with Parakeet Party Stampin’ Blends. Color the stem with the Light Soft Suede Stampin’ Blend. Color the inside of the apple with Petal Pink Stampin’ Blends. I also colored some of them with So Saffron Stampin’ Blends. Color the outside of the apples using the Light Sweet Sorbet Stampin’ Blend for the base, Dark Stampin’ Blend for the black artist markings and then go over the markings and outer side of the large apple with the Dark Poppy Parade Stampin Blend. Run both pieces through die cutting and embossing machine with the coordinating die from the Apple Blossoms Dies.
  • Adhere both apple pieces over the gold frame with liquid glue. Adhere frame piece to card front with Stampin’ Dimensionals.
  • Stamp greeting with Soft Suede ink on a scrap piece of Basic White cardstock. I used a Jewish holiday stamp set from Papertrey Ink Stamps that I’ve had for years. L’Shanah Tovah translates to Happy New Year from the Hebrew. I used the smaller label die from the Sending Dies to cut it out. Adhere in the middle of the apples with Mini Stampin’ Dimensionals.
  • Cut a piece of Basic White cardstock at 4″ x 5 1/4″. I stamped the criss-cross image from the Apple Harvest stamp set in the upper right and lower left corner with Soft Suede ink. Stamp greeting. Adhere to inside of card.

This card turned out totally different than the original idea I had and was twice as much work! I made twenty cards and spent every spare hour I had all of last week to get them finished. I’ve already received thank you messages from several recipients telling me how much they loved the card so it was worth the extra effort!

Final reminder that today is the last day the Apple Blossoms Dies will be available to order.

Thanks for stopping by today!

Tomorrow, October 1st, is World Card Making Day! Stampin’ Up! will be hosting a virtual event from 2:00pm-5:00pm Mountain Time (4:00pm-7:00pm Eastern Time). Click here to access the link to join the event.

Product List

Slice of Happiness Rosh Hashanah Card

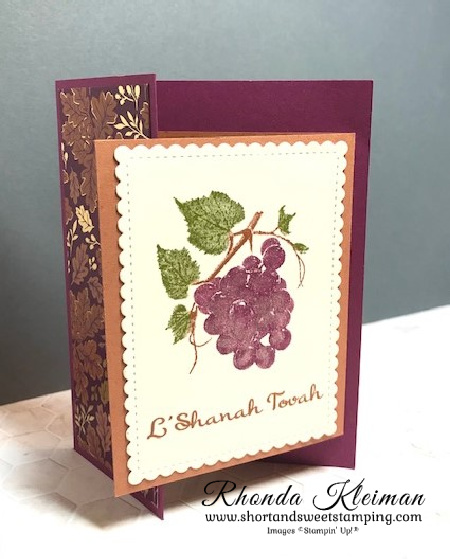
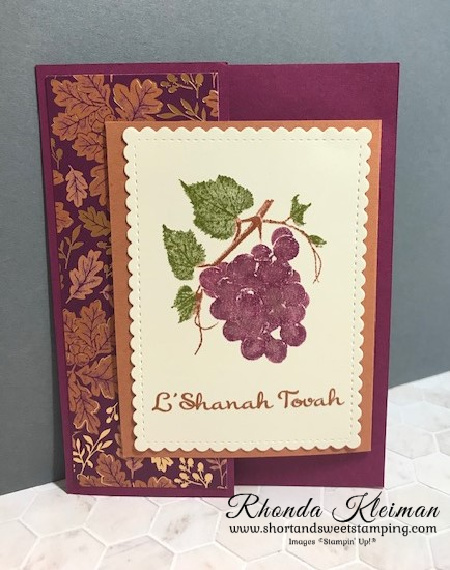
Hello! I made today’s card to send to my friends and relatives for the Jewish New Year, Rosh Hashanah. Stampin’ Up! hasn’t had a Jewish holiday stamp set for many years so every year I take on the challenge of using SU products to create my holiday cards. It is amazing what you can come up with! I can usually adapt one of our packages of Designer Series Papers from the holiday catalog, or sometimes there are stamp sets that contain images that are symbols of the Jewish New Year. When I saw the gorgeous Blackberry Beauty Specialty Designer Series Paper in the July-December 2021 Mini Catalog, the rich purples made me think of grapes, which is one of the symbols. I thought immediately of the retired stamp set, Slice of Life from the 2019-2020 Annual Catalog, because one of the images is grapes. I used this stamp set to make my holiday card in 2019 and used the pomegranate image on that card. You can see it in this blog post. I used a set of Jewish holiday greetings from a retired Papertrey Ink stamp set. I also used one of my favorite fun-folds, which is a great way to showcase a stamped image.
Here is how I made the card.
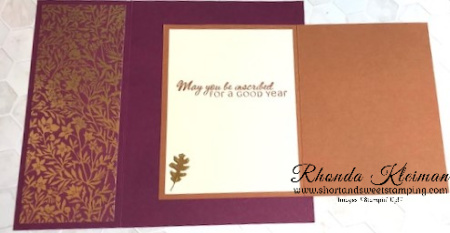
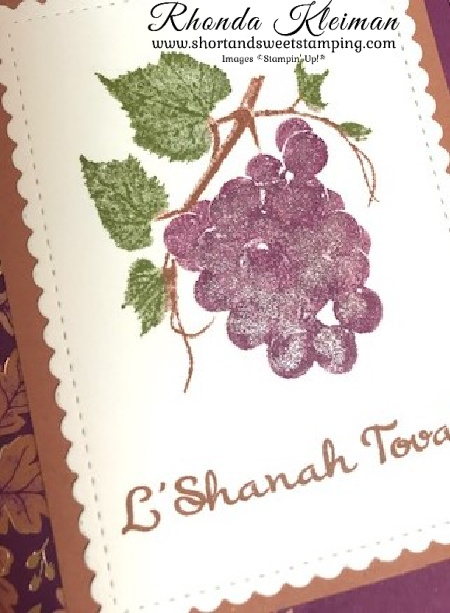
  • Card base – cut a piece of Rich Razzleberry cardstock at 5 1/2″ x 6 1/2″. Score at 2 1/4″. Fold and crease sharply with a bone folder.
  • Cut two strips of Blackberry Beauty DSP at 2″ x 5 1/4″. I used two different papers, one for the front fold and one for the inside fold. Adhere to both sides of the fold.
  • Smaller card base – cut a piece of Cinnamon Cider cardstock at 6 1/2″ x 4 1/4″ and score at 3 1/4″. Fold and crease sharply with a bone folder. Cut a piece of Very Vanilla cardstsock at 3″ x 4″, stamp greeting with Cinnamon Cider ink and adhere to the inside left side of the card base. Cut a scrap piece of Gold Foil and run it through your die cutting machine with one of the small leaf dies from the Beautiful Leaves Dies. Adhere with small dots of liquid glue to bottom left of the greeting piece.
  • Cut piece of Very Vanilla cardstock at 3 1/2″ x 4 1/2″ and run through your die cutting machine with the largest rectangle from the Stitched so Sweetly dies.
  • Use the direct-to-rubber coloring technique to color the grape image with Stampin’ Write Markers. I used Old Olive for the leaves, Cinnamon Cider for the branches and Rich Razzleberry for the grapes. Stamp onto the Very Vanilla cardstock, leaving room to stamp the greeting at the bottom. Stamp the greeting with Cinnamon Cider ink. Add some sparkle to the grapes with Wink of Stella.
  • Adhere the piece to the front of the Cinnamon Cider card base. Note that the folded base will open from left to right so make sure the opening is in the right direction before you adhere the stamped image!
  • Adhere the smaller card to the Rich Razzleberry card base so that the front of the smaller card overlaps the front fold of the larger card.

Thanks for stopping by today!

Place an online order between $50 and $149 and use this host code for September. You will receive a free gift from me the following month.  If your order is $150 or more DO NOT use the host code. You will qualify for Stampin’ Rewards.

Christmas Kit Now Avaliable!

Christmas Whimsy is an adorably festive card kit with a modern design! In this all-inclusive kit, the hard work is done for you! All pieces are printed, die cut, and ready for you to craft. The simple steps of this kit are perfect for beginner crafters and kids, too! Grab a kit or two and gather around for a simple Christmas activity that everyone will enjoy. The kit contains everything you need to create eight elf-centric Christmas cards including printed card bases, die cuts, embellishments, an exclusive stamp set, a Night of Navy Classic Stampin’ Spot, and more! Create two each of four designs, finished size of cards is 5 1/2″ x 4 1/4″. Coordinating colors: Balmy Blue, Basic Gray, Crumb Cake, Evening Evergreen, Gray Granite, Misty Moonlight, Poppy Parade, Real Red, So Saffron, Soft Succulent, Soft Suede. You can order this kit, Item # 158155, in my online store. Cost of the kit is $19.00.

Product List
Paper Snips
[103579]
$10.00

Forever Blossoms Wedding Card

Hello! My cousin’s daughter was married two weeks ago so I needed to make a wedding card. It’s been a few years since I’ve had to make a wedding card! All of the wedding stamp sets I have are retired so I turned to Pinterest for some inspiration and saw a number of ideas for cards that use the Forever Blossoms stamp set. I own this beautiful stamp set and haven’t used it recently so decided to give it a little love.
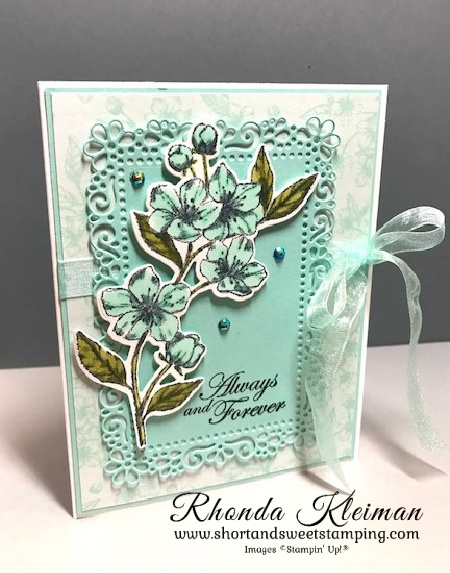
Here’s how I made the card.
  • Card base – Cut a piece of Thick Basic White cardstock at 5 1/2″ x 8 1/2″, score at 4 1/4″, fold and crease with a bone folder.
  • Cut a piece of Pool Party cardstock at 4 1/8″ x 5 3/8″ and a piece of coordinating Designer Series Paper at 4″ x 5 1/4″. I used the Parisian Blossoms Specialty Designer Series Paper, which is now retired. It was part of the Parisian Blossoms Suite in the January-June 2020 Mini Catalog. Adhere the two pieces together. Cut a 24″ length of Pool Party Sheer Ribbon and tie in a bow around the piece. Adhere piece to card front.
  • Run a 4″ x 5″ piece of Pool Party cardstock through your die cutting machine with the next-to-largest die in the Ornate Layers die set. Stamp the “Always and Forever” greeting from the Forever Blossoms stamp set with Tuxedo Black Memento ink in bottom right corner.
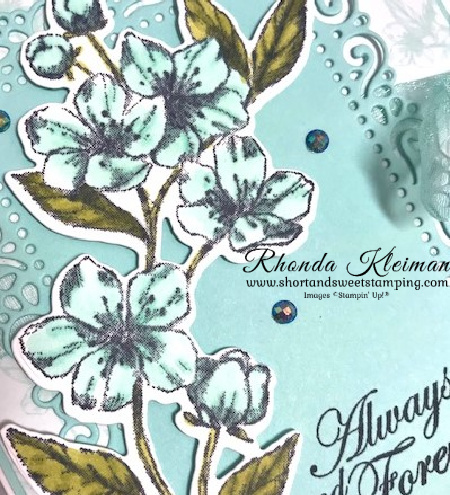
  • Stamp the large floral image from the stamp set with Memento ink on piece of Basic White cardstock. Color the flowers with the light and dark Pool Party Stampin’ Blends and color the leaves with the light and dark Old Olive Stampin’ Blends. Run through your die cutting machine with the coordinating die from the Cherry Blossoms Dies.
  • Adhere the Pool Party Ornate Layer piece to card front. Adhere the floral piece over the Ornate Layer piece with Stampin’ Dimensionals.
  • Add a bit of bling to accent the floral piece by adhering three Night of Navy Blue Adhesive-Backed Gems.
  • For the inside of the card I stamped another greeting from the Forever Blossoms stamp set with Memento ink. I also stamped a blossom in the lower left corner and colored it in with the Pool Party Stampin’ Blends.

Thanks for stopping by today!

Place an online order between $50 and $149 and use this host code for September. You will receive a free gift from me the following month.  If your order is $150 or more DO NOT use the host code. You will qualify for Stampin’ Rewards.

Join Stampin’ Up! now through September 30th. You get to select $125 worth of products for only $99 and will also get a FREE bundle from the Holiday Catalog! The kit ships for free. I’d love to have you join my team. Become a happy discount shopper or build a business – the choice is yours! Click here for the benefits of joining Stampin’ Up!

Here is a list of bundles you can select from.

Experience everything the autumn season has to offer with the Haunts & Harvest Paper Pumpkin Kit! This month’s kit includes enough supplies to create 12 treat boxes—4 each of 3 designs. That means you can take your pick of apple, pumpkins, or jack-o-lantern treat boxes! Plus, the Paper Pumpkin box is designed to easily transform into a vintage wheelbarrow for you to display your harvest! The kit contains enough supplies to create 12 treat packages—4 each of 3 designs. The all-inclusive kit includes printed die-cut boxes, die-cut sheets, adhesive, and more! Finished treat box size: 2-1/2″ x 2″ (6.4 x 5.1 cm). Coordinating colors are Basic Black, Pale Papaya, Poppy Parade, Pumpkin Pie, Soft Succulent. Subscribe now through September10th. The kit will arrive in your mailbox around the 20th of the month. For further information and to subscribe, click here to visit my Paper Pumpkin website.

Product List
Paper Snips
[103579]
$10.00

Chanukah Greetings

Hello! Happy Chanukah to my Jewish customers, friends and family! I’m playing catch-up with my blog posts so I’m posting this later then I had planned, but there are still a few days left before the holiday ends on Thursday evening!
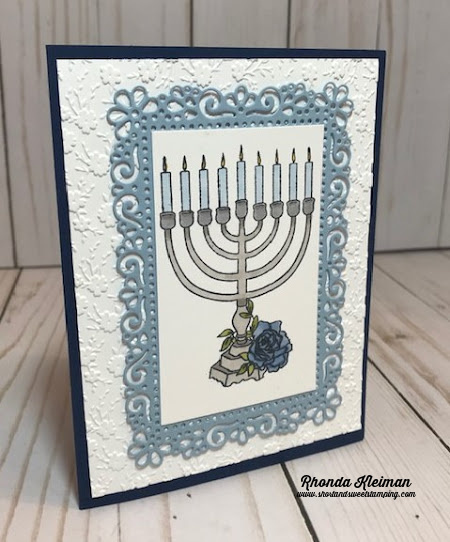
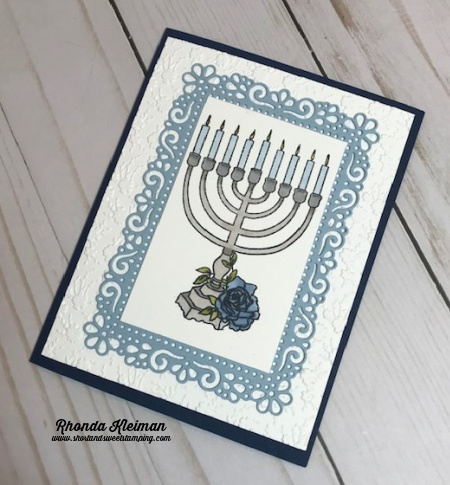
This is one of the rare times that I am posting a project that doesn’t use a stamp set from Stampin’ Up! We haven’t had a new Chanukah stamp set in many years and I’ve used all of my old sets so many times that I needed a “pick me up!” so purchased this set, Love and Light, from Altenew. It comes with a coordinating die, but I didn’t use it for this card. Everything else on this card is from Stampin’ Up!

Here is how I made the card.
  • Card base – cut a piece of Night of Navy cardstock at 5 1/2″ x 8 1/2″, score at 4 1/4″, fold and crease with a bone folder.
  • Cut a piece of Whisper White cardstock at 4″ x 5 1/4″. Run through your embossing & die cutting machine with the Ornate Floral 3D embossing folder. Adhere to card base.
  • Cut piece of Seaside Spray cardstock at 3 1/2″ x 5″. Use the second largest of the wider dies in the Ornate Layers die set and run through your embossing & die cutting machine.
  • Cut piece of Whisper White cardstock at 2 3/4″ x 3 5/8″. Stamp image with Memento Black Ink. Color image with Stampin’ Blends. I used dark and light Gray Granite and light Smoky Slate for the menorah, light Seaside Spray for the candles, dark Daffodil Delight for the flames, light Misty Moonlight and dark Seaside Spray for the rose and dark and light Old Olive for the leaves. Adhere to ornate frame and adhere frame to card front.

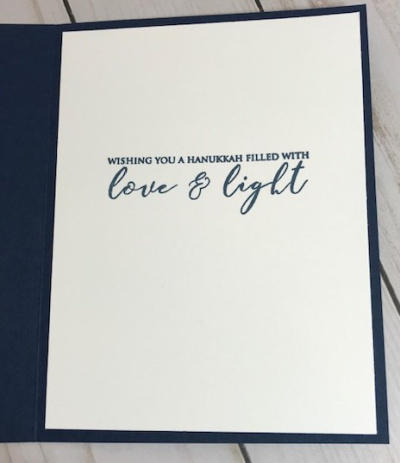
Cut piece of Whisper White cardstock at 4″ x 5 1/4″. Stamp greeting with Misty Moonlight ink. Adhere to inside of card.

Give this idea a try by changing up the stamped image!
Thanks for stopping by today!

 Product List  

Stampin’ Up!’s Year-End Closeout Sale runs through January 4, 2021. You’ll get deep discounts, some as much as 50% off, on your favorite products from the August–December 2020 Mini Catalog, also known as the Holiday Catalog.  If you’ve been waiting to make last-minute purchases from this catalog, now is the time, as availability is only while supplies last.  Please note that all of the bundles in the Holiday Catalog will be retired, however some stamp sets with coordinating dies or punches that are currently sold as bundles at 10% off will be carrying over and will be sold as individual items. 

Click here to view a list of retiring items.

Click here to view a list of products that will be carrying over.

You can purchase these items through my online store.

Dove of Hope for the Jewish New Year

Hello! Today’s card features the beautiful Dove of Hope bundle from the 2020 August-September Mini Catalog. This evening marks the beginning of Rosh Hashanah, the Jewish New Year, which I will observe. I make my cards every year so I am always eagerly awaiting the holiday catalog to see what products I might be able to use for my cards, as Stampin’ Up! hasn’t had a Jewish holiday stamp set in many years. It is amazing how so many products from the catalog can be used for other than Christmas cards! I enjoy making elegant holiday cards and always include foils or metallic elements for those special touches.

I was so excited to see this bundle and knew immediately that it would be one of the first purchases I made in my catalog pre-order, as the dove is a widely-used symbol for Rosh Hashanah – perfect! Looking further into the pages of the catalog, I spotted the Gold Cards & Envelopes on page 51 and thought they would work beautifully with the bundle. The last product I incorporated from the catalog was the Brightly Gleaming Specialty Designer Series Paper, which is one of the returning favorites from the 2019 holiday catalog. I used a lot of that paper last year but still had a few sheets, including the Night of Navy and copper prints. The only non-SU products I used were the greetings for the card front and inside.

Here is how I made the card.

  • Card base – the gold cards come scored so all you have to do is fold them and crease with a bone folder.
  • Cut Brightly Gleaming DSP with largest circle (3″) from the Layering Circles die set and adhere to card front.
  • Die cut the dove body, two solid wing pieces and two feathered wing pieces from Very Vanilla cardstock. When cutting the feathered pieces, I cut a piece of an adhesive sheet to fit each piece of cardstock. The adhesive should be the bottom layer of the cardstock piece so that when you adhere it to the solid wing piece it is adhered in the right direction!
  • Adhere feathered pieces to solid wing pieces. Adhere one wing to the center of dove body. Adhere the other wing, pointing up, onto the Night of Navy DSP circle. Adhere dove to circle.
  • Stamp greeting with Night of Navy ink on scrap piece of Very Vanilla cardstock that measures 3/4″ x 3 1/2″. Punch both ends with the Lovely Labels Pick a Punch. I used a greeting for the Jewish holiday, but when I use this stamp set to make Christmas cards I will use the “Peace.Joy.Love” greeting for the card front.
  • Cut piece of copper foil at 1″ x 4″ and punch both ends with the Lovely Labels Pick a Punch. Adhere greeting to copper foil label. Adhere to bottom of card.

Wishing my Jewish friends and customers a L’shanah Tovah! Happy New Year!

Thanks for stopping by today!

 Product List  
Paper Snips
[103579]
$10.00