Sip Sip Hooray-Kylie’s Training Blog Hop

Hello and welcome to Kylie Bertucci’s Demonstrator Training Blog Hop for December! I’m part of a group of talented Stampin’ Up! demonstrators from around the world that participate in Kylie’s program for building our businesses. Today’s card features the fun Sip Sip Hooray and Cheers to That stamp sets. I always gravitate to florals but when I first saw these sets in the holiday catalog they called out to me because the images and greetings can be used for so many different occasions. We made four cards using these sets in my stamping club this month and here is one of the projects we made.

Here is how I made the card.

  • Card base – cut piece of Basic Black cardstock at 4 1/4″ x 11″ and fold in half.
  • Cut piece of Silver Foil Paper at 4″ x 5 1/4″ and adhere to card base. Using the silver and white side of the papers in the Feels Like Frost designer series papers, cut piece at 3 3/4″ x 5″. I used the one with the stripes.
  • Cut piece of Basic Black cardstock at 3 1/4 x 4 1/2″. Cut piece of Whisper White cardstock at 3″ x 4 1/4″.
  • Stamp “Raise Your Glass” greeting with Memento black ink at top of Whisper White piece. On scrap piece of Whisper White cardstock stamp the Champagne glass in black ink and then stamp the fill image with Delicata Silvery Shimmer ink. Cut glass out with the coordinating die from the Sip and Celebrate Dies. Stamp the “To the New Year” greeting on scrap piece of Whisper White cardstock and cut with the thinnest die in the Stitched Rectangles die set.
  • Adhere the stamped Whisper White piece to the Basic Black mat. Adhere glass with Stampin’ Dimensionals. Adhere the stitched rectangle piece to glass stem with Stampin’ Dimensionals. Stamp bubbles with the Silvery Shimmer ink around both sides of the glass.
  • For the inside of the card cut a piece of Whisper White cardstock at 4″ x 5 1/4″. Use the bubbles die from the Sip and Celebrate Dies to create a border at the bottom of the piece and then adhere to card.

Please be sure to click on the links below to hop around to the other blogs. Thanks for stopping by today!


Slice of Happiness

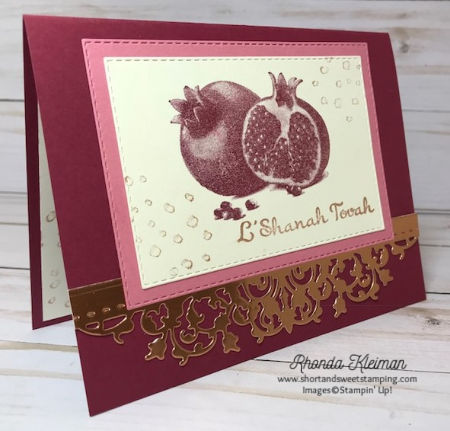
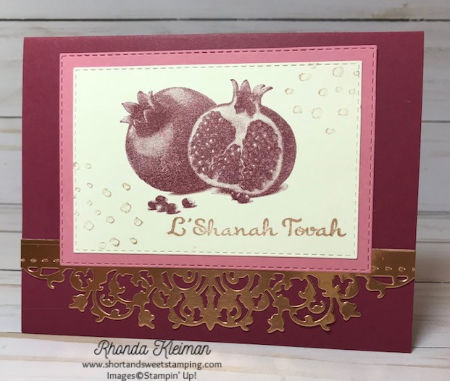
Today I’m featuring a card I made to send to my friends and relatives for the Jewish New Year, Rosh Hashanah. It has been many years since Stampin’ Up! has had a Jewish holiday stamp set, except for a few occasional Hanukkah greetings, so every year I take on the challenge of using SU products to create my holiday cards. It is amazing what you can come up with! When I received the 2019-2020 Annual Catalog, as soon as I spotted the pomegranate image in the new Slice of Happiness stamp set pictured on page 129, I knew it would be perfect for my cards. The pomegranate is a symbol that is frequently used in Jewish imagery as it signifies fruitfulness, knowledge, learning, wisdom and has special meaning for Rosh Hashanah because it is said that the pomegranate has 613 seeds, which is the exact number of commandments that are found in the Torah so it is customary to eat the fruit on this holiday. While I created this as a holiday card, you can substitute any greeting to the front and inside of the card and use it for another occasion. One note: I used a set of Jewish holiday greetings from Papertrey Ink that were designed specifically for this holiday.

Here is how I made the card.

Cut piece of Merry Merlot cardstock at 5 1/2″ x 11″ and fold in half.

Cut piece of Rococo Rose cardstock at 3 1/2″ x 4 3/4″and die cut with the 5th largest die from the Stitched Rectangle die set. Cut piece of Very Vanilla cardstock at 3″ x 4 1/2″ and die cut with the 6th largest Stitched Rectangle die.

Stamp pomegranate image with Merry Merlot ink. Stamp dewdrops with Delicata Celestial Copper ink in opposite corners of the rectangle . Adhere this piece to the Rococo Rose piece.

For the decorative border cut a piece of copper foil at 1 1/2″ x 6″ and run it through your die cutting machine with the floral die from the Delicate Lace die set. Use a light layer of liquid glue to adhere to bottom front of card. Snip off ends at each side of the die cut piece. Center the image above the foil piece and adhere to card front.

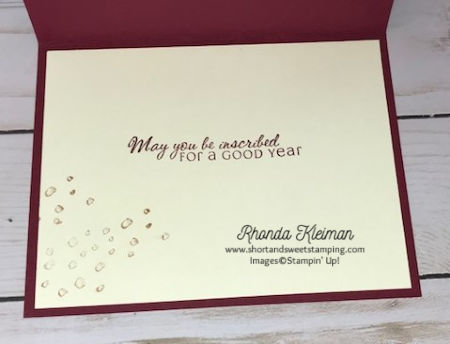
For the inside of the card cut a piece of Very Vanilla cardstock at 4″ x 5 1/4″. Stamp greeting. Stamp dewdrops at bottom left of piece with the Delicata Celestial Copper ink. Adhere to card.

Thanks for stopping by today!


 Product List  

Fable Friends for Mother’s Day

Hello! Today I have two adorable Mother’s Day cards featuring the Fable Friends stamp set, which will be carrying over to the 2019-2020 annual catalog. These cards were created by Beverly Tingom from Scottsdale, AZ. Bev was one of my first customers and although she moved away from Lancaster, PA several years ago, she remains a good customer and friend. Bev made these Z-fold cards for two of her step-daughters-in-law.

This card is for a step-daughter-in-law that has three children. In addition to the Fable Friends stamp set she also used the trees from the Beach Happy stamp set in the Occasions catalog. This set will be retiring on June 3rd. She colored the images with a variety of Stampin’ Write Markers and Stampin’ Blends. The mother duck and ducklings were all fussy-cut.

This card is for a step-daughter-in-law that has 10 children. The greeting was cut with one of the dies from the Stitched Labels Framelits Dies set. The butterfly punch and DSP are retired products.

I am sure that both of these women will love receiving these cards! Thanks, Bev for allowing me to share your work with my readers. Wishing all the mothers out there a very Happy Mother’s Day!

Place an online order between $50-$149 with me and receive a free gift. This month’s gift is a package of clear rhinestones.

Thanks for stopping by today!

 Product List  

Happy Chanukah!

Today I’m sharing the Chanukah card I sent out this year.  It’s been quite a few years since Stampin’ Up! has offered a Chanukah stamp set so each year I try to find creative ways to use retired sets, or to use current sets that have images that might be suitable.  This year I decided to go back into my retired stash and pulled out my favorite Jewish holiday set, Festive Hanukkah, which was available in the 2004 and 2005 annual catalogs.

I used Night of Navy cardstock for the base and ran a piece of Whisper White cardstock, cut at 4″ x  5 1/4″  through the Big Shot with the Swirls and Curls Textured Impressions Embossing Folder, which is available in the current holiday catalog.  I stamped the image with Versamark onto a piece of Night of Navy cardstock cut at 2 1/2″ x 3 1/4″ and heat embossed the image using Copper Embossing Powder. Next, I cut a piece of copper foil at 2 3/4″ x 3 1/2″ and adhered it to the stamped image.  I cut a 12″ piece of Night of Navy Crinkled Seam Binding Ribbon (retired), folded it in half, centered it in the middle of the card, and attached the image on top of the ribbon using Tear and Tape.

I attended a community Chanukah dinner this past Sunday and will attend another one on Friday evening.  For me, the highlight of the dinner is always the potato latkes – so yummy!

Wishing you a happy holiday.  May the glow of the candles burning brightly in your menorah bring warmth to your heart and home!

Thanks for stopping by today!

Product List