
Hello!
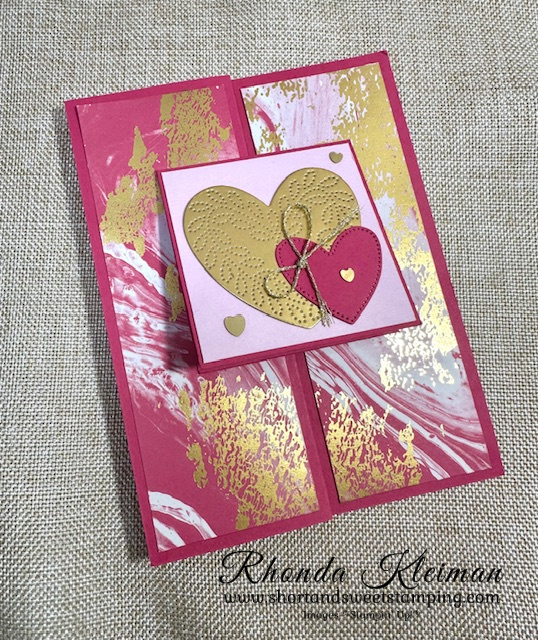
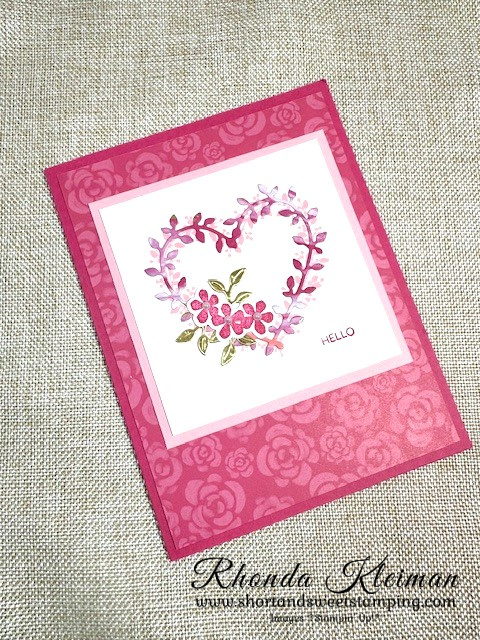
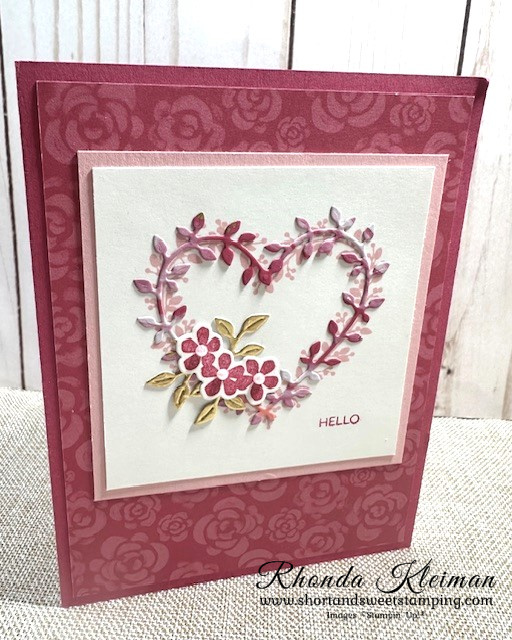
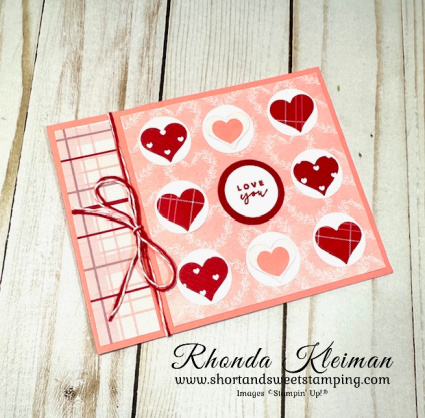
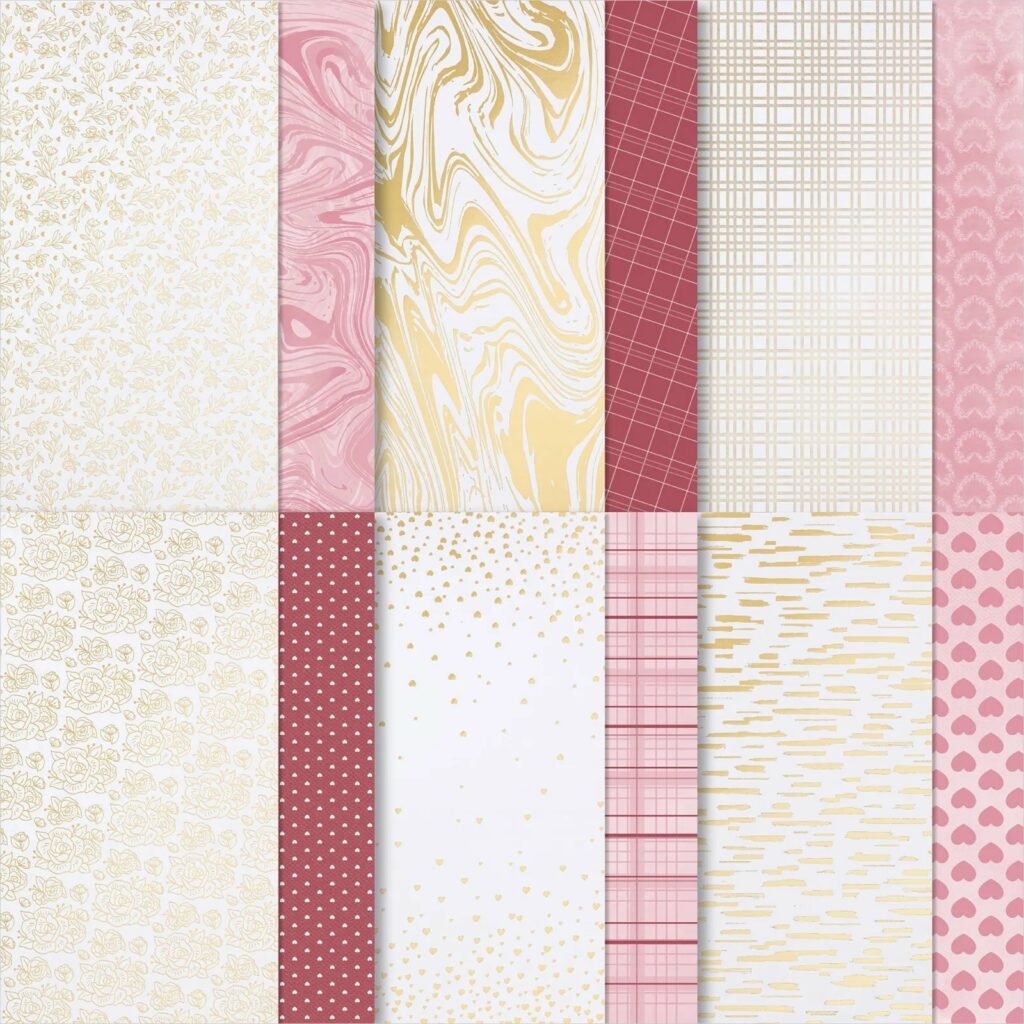
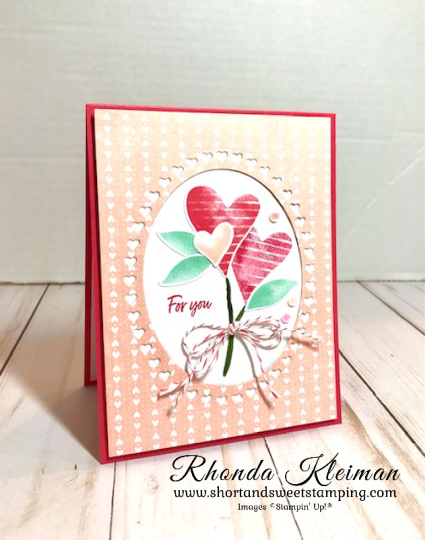
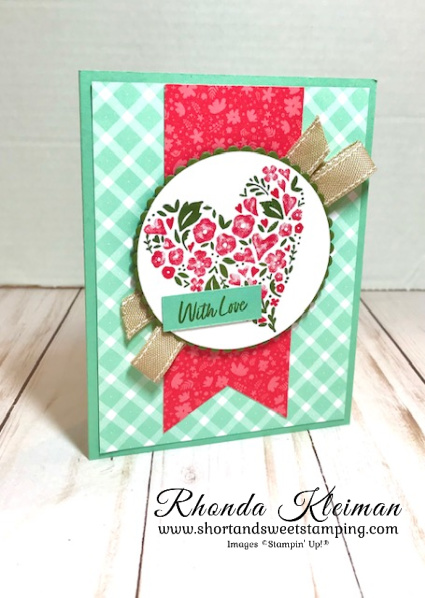
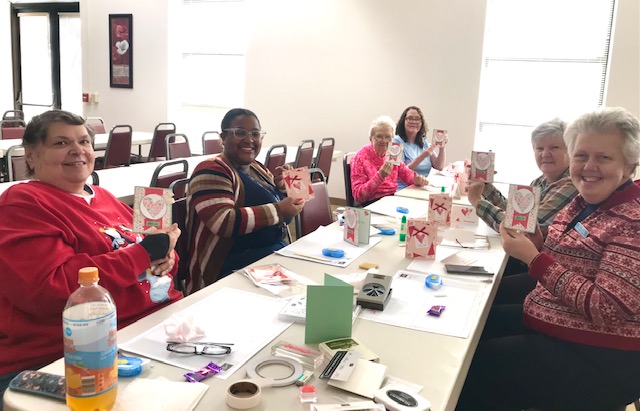
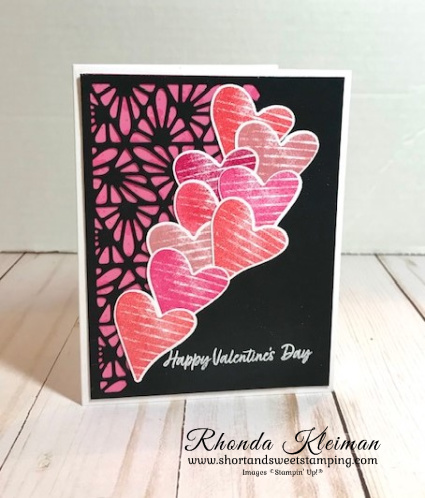
Today’s card is another card featuring the Marbled Elegance Suite. This is another one of the cards we made in my Valentine’s Day cardmaking class a few weeks ago. It is an easy to do fun fold.
Here is how I made the card.
- Cut a piece of Melon Mambo cardstock at 5 1/2″ x 8 1/2″ and score at 2 1/8″ and 4 1/4″. Fold at the 4 1/4″ score line. Fold back on the 2 1/8″ score line.
- Cut another piece of Melon Mambo cardstock at 2 1/2″ x 5″ and score at 2 1/2″. Fold in half.
- Cut three strips of Marbled Elegance DSP at 1 7/8″ x 5 1/4″. Adhere one piece to the front flap. Adhere the two remaining strips to the 4 1/4″ side of the card, leaving a space between the two pieces.
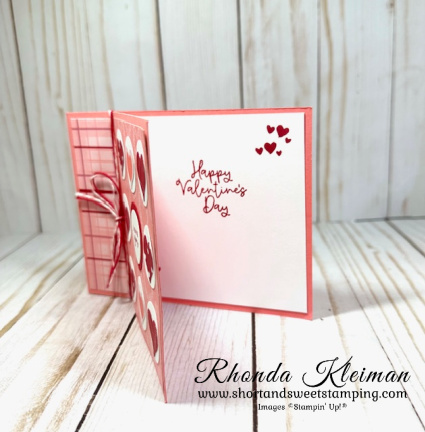
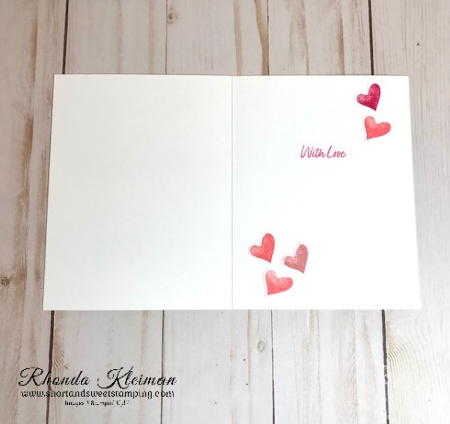
- Cut a piece of Basic White cardstock at 1 7/8″ x 5 1/4″. Stamp the greeting and heart pattern from the Hearts of Elegance stamp set with Melon Mambo ink. Adhere to the inside of the front fold.
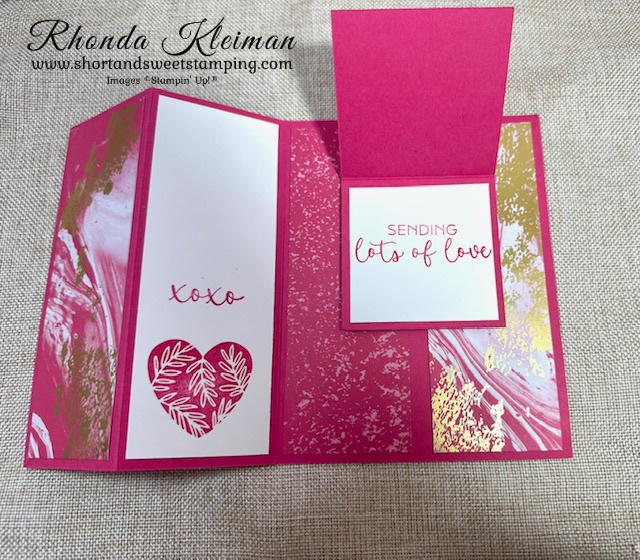
- Cut a piece of Basic White cardstock at 2 1/4″ x 2 1/4″. Stamp greeting with Melon Mambo ink and adhere to inside of smaller card.
- Cut a piece of Bubble Bath cardstock at 2 1/4″ x 2 1/4″ and adhere to front of smaller card. Cut a piece of Gold Foil paper at 2 1/2″ x 2 1/2″. Run through die cutting and embossing machine with the filligree patterned solid die from the Hearts of Elegance Dies. Run a scrap piece of Melon Mambo cardstock through the die cutting machine with the smallest solid die. Adhere the gold heart to the front of the smaller card. Adhere the Melon Mambo heart over the bottom right side of the gold heart.
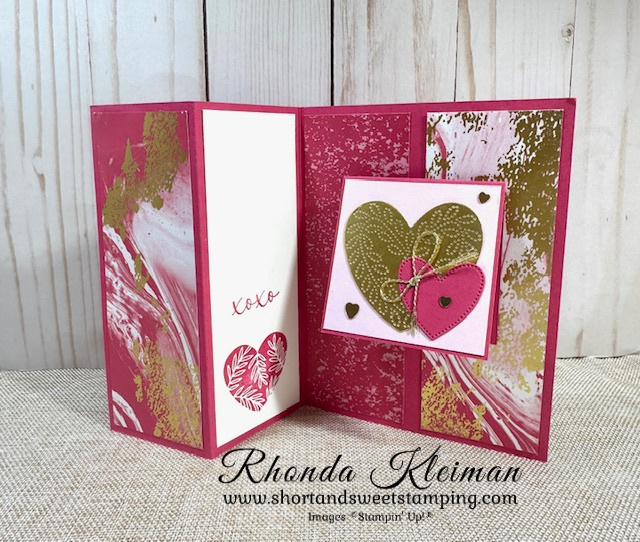
- To adhere the smaller card to the larger card, adhere three Stampin’ Dimensionals to the back of the smaller card on the right hand side. Fold the larger card, line up and center the smaller card to the larger card front. Adhere the smaller card to the right side of the card. Pull on the folded front of the larger card to open it up and to close it, tuck it back under the left side of the smaller card.
- Embellish with a few of the Adhesive Backed Heart Sequins. Cut a length of Gold Twisted Thread and tie in a small bow. Adhere with a glue dot.
Thanks for stopping by today!

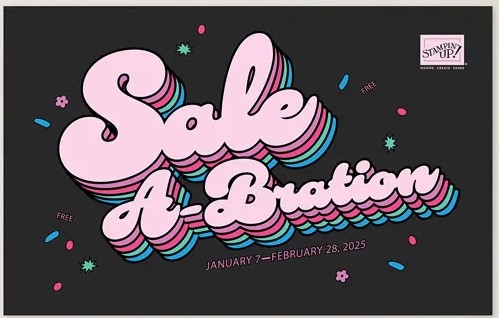
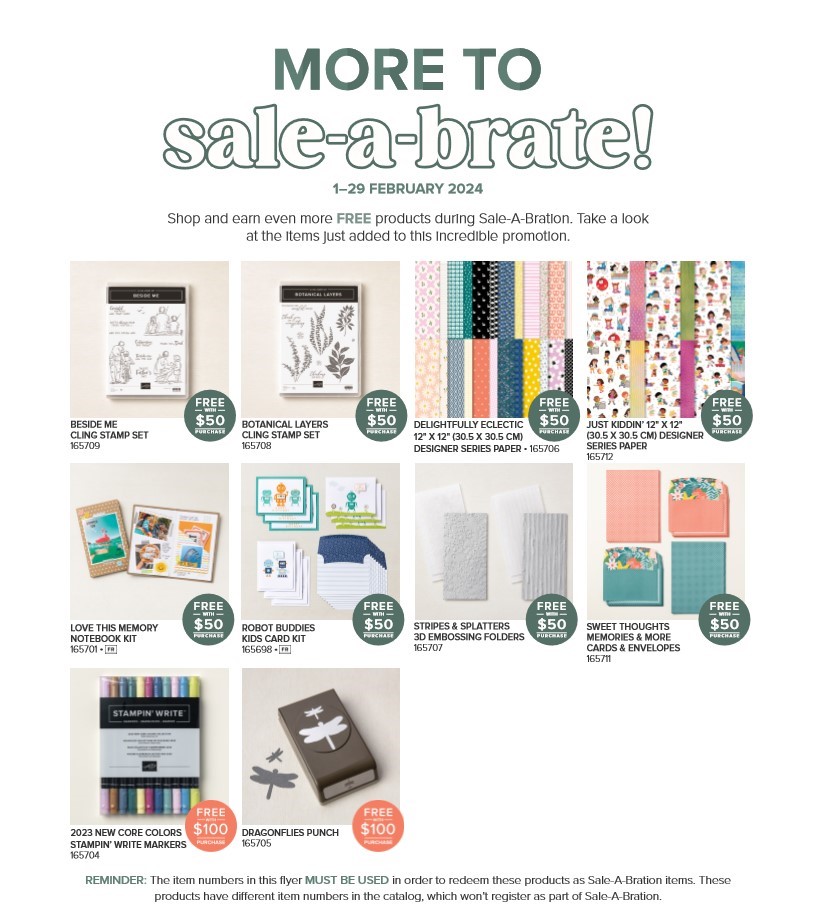
Join Stampin’ Up! in January and February during Sale-A-Bration.
Build your starter kit by choosing $125 worth of products for only $99. FREE SHIPPING is included. You will also earn exclusive Sale-A-Bration gifts. Select from two bonus options.
- Receive two sets of Stampin’ Write Markers in the color families of your choice and the Handmade Designs stamp set
- Choose an additional $30 in FREE products.
You do not have to do Stampin’ Up! as a business. Join as a happy discount shopper and receive 20% off all orders. There is no penalty if you decide to drop as a demonstrator. I’d love to have you join my team. Please don’t hesitate to contact me for more details.
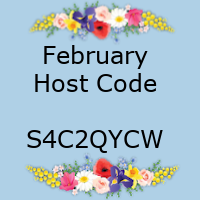
Place an online order between $50 and $149 and use this host code for February. You will receive a free gift from me the following month. If your order is $150 or more DO NOT use the host code. You will qualify for Stampin’ Rewards.
Product List  |  | |
 |  |  |
 |  | |
 |  |  |
 |  |
")
")
")
 Specialty Designer Series Paper")


")


")


")
")
 Specialty Designer Series Paper")


")
")
")


 Designer Series Paper")
 Designer Series Paper")
 Designer Series Paper")


 Designer Series Paper")


